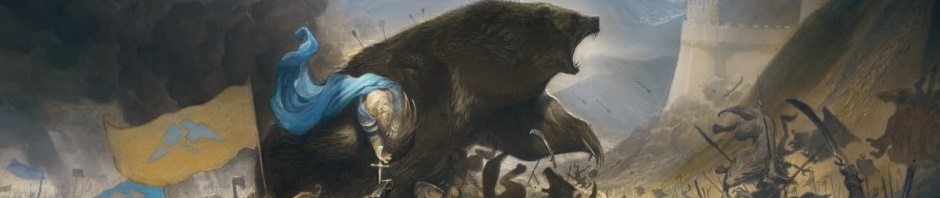
“Come, see the lovely landscapes of the central Anduin Valley!”, they said;
“Experience the wondrous vistas from the Falls of Rauros”, exclaimed the poster advert;
“You have never seen anything like the beauty of Amon Lhaw”, promised the travel agent;
“Amon Hen is a beatific haven blessed by Yavanna herself”, boasted the woodland inn-keeper.Lies, all of it was lies. I came to the Hills of Emyn Muil for a nice vacation, and I all I get is hills, hills and more hills. Oh, and did I mention the Orcs? The whole blasted region is filled to the brim with smelly Orcs. Need I remind you that bears have excellent olfactory organs? All I want is a nice quiet break from the everyday monotony of Troll-killing, and I can’t even sleep because my nose is filled with the rank odor of unwashed Orc!
I’m talking to that mangy Dwarven travel agency when I get back to the Carrock; I’m getting my money back, even if it means I have to toss a Dwarf or two. You can’t even stretch your paws, or take a nice amble on all fours, without running into some cesspool or other “exotic” location. This has been the worst vacation since I tried to take Mrs. Beorn to Erebor for our honeymoon…

At our last stop on Beorn’s Path, we successfully delivered Wilyador to Radagast the Brown, so that the wizard could save the injured eagle. We now turn to the Hills of Emyn Muil, where we must collect postcards from each of the tourist locations. I jest, but this scenario is definitely different from the other quests we’ve undertaken in the Shadows of Mirkwood cycle. Rather than hunting for escaped prisoners, or facing terrible enemies, or having to save injured friends, we will be traveling to various locations around Emyn Muil. Many, many, many locations.
To give you an idea of just how different this scenario is, The Hills of Emyn Muil has only 1 quest stage, and that stage has only a single quest point. However, like much in Middle-Earth, all is not as simple as it may at first seem. In addition to that 1 quest point, we must also earn at least 20 victory points and not have any Emyn Muil locations in play. As we will see, that last requirement will end up being the most difficult as the vast majority of the encounter deck is made up of Emyn Muil locations.

As with our Journey to Rhosgobel, an unorthodox scenario will require a less traditional strategy, and we will be making changes to our player deck accordingly. Because we need to clear all Emyn Muil locations from play, we only want to be revealing 1 encounter card per round, so this scenario is better played solo, with only a single deck. We could play with a spirit deck, and include Northern Tracker, but then this scenario becomes easy to the point of being boring. Besides, this will give us a chance to test just how flexible our Leadership/Lore deck really is; we want to see if we can adjust it to this scenario without having to completely remake it.
With that in mind, let’s take a look at changes that we can make to our Leadership/Lore deck that will help us safely navigate The Hills of Emyn Muil. The particular challenges presented by our Journey to Rhosgobel put a premium on healing effects, especially Lore of Imladris, since it can target allies. With combat a much lower priority, our first change will be to remove 3 copies of Lore of Imladris. Additionally, ranged is a much less important keyword in the quest, so we can remove a copy of Haldir a copy of Lorien’s Wealth and a single Song of Wisdom. With questing more important than combat, and no treacheries that become Condition attachments, we will remove 2 copies of Miner of the Iron Hills and 2 Dúnedain Warnings.
 With a total of 10 cards removed, we will add the following cards to bring the deck back to its original size: Gildor Inglorion x2 (expensive, but 3 willpower), Dúnedain Quest x2 (for Aragorn), Self Preservation x1 (offset removing the Lore of Imladris), Dúnedain Mark x2 (we want to kill enemies quickly), Guard of the Citadel x2 (for questing) and, last but not least, one more copy of Rivendell Minstrel. The minstrel not only provides 2 vital willpower for questing, but helps us ensure that we get a song on whichever hero has Steward of Gondor. Please refer to the complete deck list, which can be found on the Decks page. With those changes in place, we are ready to start our “relaxing vacation” through the Hills of Emyn Muil.
Setup and Opening Hand
 The all-important opening hand brings us: Daughter of Nimrodel, Henamarth Riversong, Secret Paths, Celebrian’s Stone, Faramir, and A Burning Brand. While it would have been nice to see Steward of Gondor or Gleowine, we need to keep this opening hand. Questing is the most important aspect of this scenario, even more so than resource generation or card drawing effects. We want cards that will help us quest effectively because the most common way to lose this scenario is with the staging area filling up with locations.
Faramir is not going to let that happen, and Aragorn equipped with Celebrian’s Stone is a fantastic for questing. Secret Paths is likewise a perfect card to have in this scenario, though with only two copies in the deck, we will need to be judicious and wait for the best possible moment to play this card. With our opening hand decided, we add Amon Hen and Amon Lhaw to the staging area, and we are ready for the first round.

Round 1: Stage 1B (0 of 1 progress, 0 of 20 victory points)
28 threat (First Player)
Hand: D. of Nimrodel, H. Riversong, Secret Paths, Celebrian’s Stone, Faramir, A Burning Brand
— Aragorn: 1 resource, 0 damage (5 of 5 hit points)
— Theodred: 1 resource, 0 damage (4 of 4 hit points)
— Denethor: 1 resource, 0 damage (3 of 3 hit points)
Staging Area: Amon Hen, Amon Lhaw
For our first turn, we add resources to each of our intrepid heroes and draw a Sneak Attack. This has the potential to be a great card, but it doesn’t make sense to use it with any of the allies currently in our hand, so we will hold onto it for now. For planning we are simply going to pay 2 leadership resources to attach Celebrian’s Stone to Aragorn. The stone was passed down to Arwen from her mother, and it now helps Aragorn to quest for an impressive 4 each round, so we’re off to a promising start.
 For the quest phase we will commit Aragorn and Theodred to the quest. In a more combat-heavy, this is where we would ordinarily use the extra resource from Theodred to ready Aragorn. In this case, we desperately need to save up to play Faramir, so we will trigger Theodred and add a ready to Aragorn, but keep him exhausted. This is a small risk, but we want to get the second son of Denethor into play as quickly as possible. His ability will mean the difference between sweet taste of victory, and the foul stench of an Orc-lair.
 For staging, we reveal Pursued by Shadow which causes us to raise our threat to 29. With 5 willpower against 4 threat in the staging area, we make the 1 progress needed on the first, and only, stage of this scenario. Looking at our victory display, we don’t have any of the 20 victory points needed in order to complete the quest, so we have a long way yet to go. Since we don’t need to play any events right away, we will go ahead and travel to Amon Hen. If we had instead traveled to Amon Lhaw, Aragorn would no longer get his bonus from Celebrian’s Stone, so will need a bit more time to prepare for that leg of the journey. Before ending the round, Denethor will scry the encounter deck for an East Wall of Rohan, which we will put on the bottom of the encounter deck. This early in the game, we can’t risk filling the staging area with a 4 threat location, especially when Amon Hen makes it so that we can’t use Secret Paths to mitigate that threat.
Round 2: Stage 1B (1 of 1 progress, 0 of 20 victory points)
30 threat (First Player)
Hand: D. of Nimrodel, H. Riversong, Secret Paths, Faramir, A Burning Brand, Sneak Attack
— Aragorn: 1 resource, 0 damage (5 of 5 hit points)
— Theodred: 1 resource, 0 damage (4 of 4 hit points)
— Denethor: 2 resources, 0 damage (3 of 3 hit points)
Staging Area: Amon Lhaw, Dol Guldur Beastmaster
Active Location: Amon Hen
For our second round in the “lovely” hills above Rauros, we add resources and draw Gildor Inglorion. The elf is great for questing, but it’s going to be a while before we can convince him to join the party. I can’t say that I blame him, what with the prospect of following some foolish men as they wander aimlessly though the foothills. It’s no wonder the elves look askance at their mortal cousins. For planning this round we will play Henamarth Riversong and save our remaining resources.
 We will again commit Aragorn and Theodred to the quest, along with Henamarth Riversong. This time we will ready Aragorn with the bonus resource from Theodred, since we will have enough to pay for Faramir next round regardless. During staging, a Dol Guldur Beastmaster is revealed, and my nose curls in contempt. An Orc on the path is like a hair floating in the mead: no one wants it there, but there is no way to remove it without getting dirty. With 6 willpower against 4 threat, we place two progress on Amon Hen.
Because we cannot afford to let the staging area will up, we will actually choose to optionally engage the Dol Guldur Beastmaster. Because we also want to keep using Denethor to avoid the worst that the encounter deck has to offer, we will take the unorthodox strategy of having Aragorn block the Beastmaster. With 2 shadow cards being dealt to the stinking Orc, this decision may backfire, but Aragorn is quite hearty with 5 hit points, and we do have healing effects in this deck.
 After dealing the two shadow cards and exhausting Aragorn, we flip The Shores of Nen Hithoel and Eastern Crows. This is truly unfortunate, not only does the Beastmaster get +1 to his attack, but he returns to the staging area after attacking and so will contribute his threat again next round. Aragorn takes 2 damage from the attack and it looks like the decision to optionally engage the Beastmaster may have been a poor one.
At the end of the combat phase, we will again trigger Denethor’s ability to see what fate has in store for us next round. All things considered, The Highlands is a relatively benign location. We need to get 20 points worth of locations in our victory display, so we will keep it on top of the encounter deck and move on to next round.
Round 3: Stage 1B (1 of 1 progress, 0 of 20 victory points)
31 threat (First Player)
Hand: D. of Nimrodel, Secret Paths, Faramir, A Burning Brand, Sneak Attack, Gildor Inglorion
— Aragorn: 3 resources, 2 damage (3 of 5 hit points)
— Theodred: 2 resources, 0 damage (4 of 4 hit points)
— Denethor: 2 resources, 0 damage (3 of 3 hit points)
Staging Area: Amon Lhaw, Dol Guldur Beastmaster
Active Location: Amon Hen (2 of 4 progress)
Allies: Henamarth
With resources gathered, we draw a copy of Valiant Sacrifice. This is where combos can be problematic. We have Sneak Attack but no Gandalf and now Valiant Sacrifice, but no cheap ally that we want to sacrifice for some extra cards. At first glance, Henamarth might seem like a natural choice, since he only costs 1 resource, but his ability is very important in a scenario with cards that can be game-ending. So we will add Valiant Sacrifice to our growing list of “to be determined” cards. For planning we can finally afford to bring Faramir to the party and we will attach A Burning Brand to Denethor, so that we don’t have a repeat of our earlier fiasco with the Beastmaster.

Aragorn, Theodred and Henamarth will again commit to the quest. Aragorn will ready thanks to Theodred’s bonus resource and will go ahead and trigger Faramir’s ability since we know what it on top of the encounter deck. After The Highlands is revealed, we explore Amon Hen (our first victory points!) and add 1 more meaningless progress to stage 1B. For travel, we will go ahead and move to The Highlands, which requires us to reveal another card from the encounter deck. While Dol Guldur Orcs is a very annoying card to see during the quest stage, we don’t have any characters committed to the quest during the travel phase, and we come out unscathed this time.

 For the encounter phase, the Dol Guldur Orcs will engage us. Denethor exhausts to defend, and their shadow card of Orc Horse Thieves is cancelled. Denethor does not suffer any damage and Aragorn kills the Orcs on the counter-attack. Action advantage is so important; the fact that Aragorn currently has 4 willpower and 3 attack, and that we can use him for both questing and attacking each turn, is one of the real strengths of this deck. With Denethor exhausted, we cannot use his ability, so next round will be filled with mystery. Let’s hope that the encounter deck doesn’t bring any unpleasant surprises.
Round 4: Stage 1B (2 of 1 progress, 5 of 20 victory points)
32 threat (First Player)
Hand: D. of Nimrodel, Secret Paths, A Burning Brand, Sneak Attack, Gildor Inglorion, Valiant Sacrifice
— Aragorn: 2 resources, 2 damage (3 of 5 hit points)
— Theodred: 1 resource, 0 damage (4 of 4 hit points)
— Denethor: 1 resource, 0 damage (3 of 3 hit points)
Staging Area: Amon Lhaw, Dol Guldur Beastmaster
Active Location: The Highlands
Allies: Henamarth, Faramir
In the resource phase, we draw Gleowine. This is good news, we need to accelerate our card-drawing and hopefully find a copy of Steward of Gondor so that we can start to pay for all of these cards in our hand. For planning we are going to save our resources. Unfortunately, without resource acceleration, and with the wrong cards in our hand, the deck is stalling a bit.

At the beginning of the quest phase, let’s exhaust Henamarth to look at the top of the encounter deck. The next card is The North Stair, which should not be a problem. Like many of the locations in this scenario, we will need to carefully time when we travel there. For questing, we will commit Aragorn, Theodred and Denethor. We will trigger Theodred’s ability to give a resource to Aragorn and then use Faramir to give each of our characters an additional willpower.
For staging we reveal the North Stair, explore The Highlands, and put one more progress on stage 1. Next, we will travel to Amon Lhaw. We need to be careful next round, as Celebrian’s Stone will not be providing its bonus to Aragorn, now that Amon Lhaw is the active location. Hopefully we can push through with enough willpower to explore Amon Lhaw and no longer have to worry about this very negative effect.
Round 5: Stage 1B (3 of 1 progress, 6 of 20 victory points)
33 threat (First Player)
Hand: D. of Nimrodel, Secret Paths, A Burning Brand, Sneak Attack, Gildor Inglorion, Valiant Sacrifice Gleowine
— Aragorn: 4 resources, 2 damage (3 of 5 hit points)
— Theodred: 2 resources, 0 damage (4 of 4 hit points)
— Denethor: 2 resources, 0 damage (3 of 3 hit points)
Staging Area: The North Stair, Dol Guldur Beastmaster
Active Location: Amon Lhaw
Allies: Henamarth, Faramir
Our new card for this turn is Gandalf. As always, the grey Wizard’s timing is impeccable. Just when we need a strong questing push, to move past Amon Lhaw, we find ourselves with an Istari and Sneak Attack in hand. Valiant Sacrifice will mean that we even get to draw some cards out of the bargain. For planning, we will play Gleowine and trigger Henamarth’s ability. The top card of the encounter deck is an Evil Storm, which is perfect because our threat has not yet hit 35 so the storm will pass right by us.

For the quest phase, we will pay 1 Leadership resource for Sneak Attack and bring Gandalf into play. Triggering the wizard’s response, we get to lower our threat to 28. While care draw might seem nice at this point, we have Gleowine in play and Valiant Sacrifice in hand, so the most important thing is to buy ourselves time to earn the 20 victory points that we need in order to complete the quest. Knowing that staging will be harmless this round, we can now commit Aragorn, Theodred and Gandalf to the quest. We will add 1 to Aragorn from Theodred’s ability.
 We reveal the harmless Evil Storm, and because there is a location in the staging area, it does not surge. Even without the help of Celebrian’s Stone, we have enough willpower to explore Amon Lhaw, which removes that awful effect and gives us 5 more victory points toward our goal of 20. At the end of the quest phase, Gandalf returns to our hand and we can pay 1 Leadership resource for Valiant Sacrifice. Continuing our rotten luck, we draw a Song of Kings and a second copy of Faramir. A Steward of Gondor, or even a song of Wisdom would be really nice right now, but our deck is just not cooperating.
 For travel, we will visit the North Stair, which causes Evil Storm to be triggered again. With 28 threat, we get to share in the rare joy of watching that card do nothing twice in a row. Cards like Evil Storm reinforce just how powerful Gandalf is in a Leadership/Lore deck. Since the wizard is our only means of threat-reduction, and we have access to Sneak Attack, we can ensure that we avoid all of the nasty punishments for high threat.
Before the end of the round, we have character abilities to trigger. Gleowine allows us to draw a Daughter of the Nimrodel. More Lore cards. While some of this is bad luck, this is also a sign that our ratio of Leadership to Lore cards is out of proportion. We may want to consider swapping one of Leadership heroes for a Lore hero in our next revision to this deck. Denethor scries the encounter deck and finds an Impassable Chasm. Because we no longer have any locations in the staging area this card will surge, so we will put it on the bottom of the encounter deck.
Round 6: Stage 1B (3 of 1 progress, 11 of 20 victory points)
29 threat (First Player)
Hand: D. of Nimrodel x2, Secret Paths, Gildor Inglorion, Song of Kings, Faramir
— Aragorn: 5 resources, 2 damage (3 of 5 hit points)
— Theodred: 1 resource, 0 damage (4 of 4 hit points)
— Denethor: 1 resource, 0 damage (3 of 3 hit points)
Staging Area: Dol Guldur Beastmaster
Active Location: The North Stair
Allies: Henamarth, Faramir, Gleowine
After collecting resources, we draw an Erebor Hammersmith. This is becoming a bit ridiculous, we can’t seem to draw any of our Leadership cards. This is the risk of a multi-sphere deck but card draw is supposed to solve these kind of hard-luck situations. For planning we will trigger Gleowine and draw our third copy of Daughter of Nimrodel. At this point all a bear can do is laugh, this is turning into one of those games. We will use Henamarth to peek at the top card of the deck, which thankfully is The Highlands, so we won’t have to deal with any surging treacheries.

For questing, we will commit Aragorn and Theodred. Theodred gives a resource to Aragorn and we trigger Faramir’s ability to bring our total willpower up to 7. After The Highlands is added to the staging area, we explore The North Stair and add another progress to stage 1.
 Since traveling to The Highlands will involve revealing another card, we will using Denethor at the end of the quest phase, to see what is coming. The Necromancer’s Reach is coming up next. Even with 3 copies of Daughter of the Nimrodel on hand, there is no reason to subject ourselves to this card, so we will put it on the bottom of the encounter deck.
We will pass on traveling to The Highlands, and spare ourselves the hassle of surging treacheries. The nature of this scenario, and the specifics travel and passive effects of the locations themselves, really lends itself to a slow slog, even if all we want to do is force-march through everything.
Round 7: Stage 1B (4 of 1 progress, 14 of 20 victory points)
30 threat (First Player)
Hand: D. of Nimrodel x3, Secret Paths, Gildor Inglorion, Song of Kings, Faramir, Erebor Hammersmith
— Aragorn: 7 resources, 2 damage (3 of 5 hit points)
— Theodred: 2 resources, 0 damage (4 of 4 hit points)
— Denethor: 2 resources, 0 damage (3 of 3 hit points)
Staging Area: The Highlands, Dol Guldur Beastmaster
Active Location: None
Allies: Henamarth, Faramir, Gleowine
Our card for this turn is the very useful Snowbourn Scout. Before planning, we will trigger Henamarth Riversong and are are greeted with a familiar sight. Another copy of The Highlands is on the top of the encounter deck. Was the mead that we drank last night gone bad? It’s starting to feel like we are wandering in circles in these hills. This is definitely not the vacation that I was hoping for when the missus and I were looking through the brochures. Gleowine allows us to draw second copy of Gildor. At least he will be joining us soon. Lastly, we will spend 1 Leadership resource to bring Snowbourn Scout into play and explore The Highlands (the one that’s in play, not the one we’re about to back-track to).

For the quest phase, we will commit Aragorn and Theodred, with Aragorn gaining yet another resource. Once again, we add The Highlands to the staging area – this strange trip is starting to create intense feelings of déjà vu. At this point, if we came across a laconic caterpillar smoking a hookah, it would seem perfectly ordinary. Hell, maybe he could tell us how to get out of the rabbit holes that are The Hills of Emyn Muil. So, we add 2 more progress to the stage and plan for what to do next.

 Because we need to know what we are getting into when traveling to The Highlands, we will trigger Denethor at the end of the quest phase. The top card is Rockslide, which can be game-ending at the wrong time, but will be harmless during the travel phase. If anyone doubts the power of scrying, Denethor proves just how important that ability can be, especially in a deck without access to Eleanor or A Test of Will.
For travel, we will once again visit The Highlands, the one consolation being that the Rockslide that we triggered falls on the path behind us. Our apologies to the mountain goats that we just made homeless, but even a bear has no desire to tangle with giant boulders.
Round 8: Stage 1B (6 of 1 progress, 15 of 20 victory points)
31 threat (First Player)
Hand: D. of Nimrodel x3, Secret Paths, Gildor Inglorion, Song of Kings, Faramir, Erebor Hammersmith
— Aragorn: 9 resources, 2 damage (3 of 5 hit points)
— Theodred: 2 resources, 0 damage (4 of 4 hit points)
— Denethor: 3 resources, 0 damage (3 of 3 hit points)
Staging Area: Dol Guldur Beastmaster
Active Location: The Highlands
Allies: Henamarth, Faramir, Gleowine, Snowbourn Scout
This turn we draw another Snowbourn Scout. No complaints here, at least we are stating to see some of our useful Leadership cards. For planning, we will trigger Henamarth to help us decide what or strategy for the round needs to be. Another Evil Storm on the top of the deck will again be harmless, thanks to our threat manage. However, because there are no locations in the staging area, it will surge.
Since we want to use Denethor’s ability at the end of the round, we will go ahead and leave Evil Storm card on top of the encounter deck. We will trigger Gleowine and draw a Dunedain Quest. We can use this card to make Aragorn even stronger at questing, but at this point that would be overkill. We will save our resources and move on to the quest phase.
 Aragorn and Theodred once again commit to the quest, with the ranger receiving another resource. Aragorn has so many resources at this point that missing Steward of Gondor is now moot. What we really need is a Song of Wisdom, or at least a Rivendell Minstrel to help us go fetch one. For staging, Evil Storm has no effect and surges into Slick Footing, from which we are also fortunate to suffer no ill-effects. Our timing on treacheries has been fortunate, but assiduous threat-management and liberal use of scrying effects has played a big part in this.
Resolving the quest, we explore The Highlands, again, and place 2 more progress on stage 1. We now have 16 out of the 20 victory points that we need, so hopefully this bizarre walking tour will be over soon. My paws are killing me. Before ending the round, we will use Denethor to peek at the encounter deck, and we find another copy of Slick Footing. While this will again be harmless, it will simply surge, and we want to be able to Henamarth again next round, so we will put this on the bottom of the encounter deck.
Round 9: Stage 1B (8 of 1 progress, 16 of 20 victory points)
32 threat (First Player)
Hand: D. of Nimrodel x3, Secret Paths, Gildor Inglorion, Song of Kings, Faramir, Erebor Hammersmith, Snowbourn Scout, Dunedain Quest
— Aragorn: 11 resources, 2 damage (3 of 5 hit points)
— Theodred: 3 resources, 0 damage (4 of 4 hit points)
— Denethor: 4 resources, 0 damage (3 of 3 hit points)
Staging Area: Dol Guldur Beastmaster
Active Location: None
Allies: Henamarth, Faramir, Gleowine, Snowbourn Scout
At least our deck is starting to draw leadership cards, though at this point we may not even need them. The Guard of the Citadel is our new card for this round. Again, we could play a bunch of these Leadership cards from our hand, but we don’t really need them. We will use Henamarth Riversong to see the top card of the encounter deck, which is Rauros Falls. Thankfully, our wearisome journey is almost at an end. The 3 victory points that we get for exploring the Falls will put us 1 victory point away from our destination.
We will go ahead and trigger Gleowine and draw another Erebor Hammersmith. In any other scenario, all of the allies would be immensely useful, but The Hills of Emyn Muil is all about locations, so once we get enough willpower to quest successfully each round, we just have to manage our threat and be patient. As a giant bear, and fearless Orc-slayer, patience has never been one of my strengths.
 For the quest phase, we will once again commit Aragorn and Theodred, and once again add a resource to the Son of Arathorn’s resource pool. We reveal Rauros Falls for staging and make 1 more progress on stage 1. While we could, of course, optionally engage the Dol Guldur Beastmaster that has been sitting in the staging area for most of the game, we don’t want a location to be discarded as a shadow effect, so we’re going to continue our steady, monotonous pace on the trail through the hills.
At the end of the quest phase we will use Denethor to scry the encounter deck. Chieftan Ufthak is a bit bigger of any enemy than we really want to deal with right now, and we are still looking for one more location, so we will put that enemy on the bottom of the encounter deck. Since Rauros Falls will force us to commit everyone to the quest, we want to hold off on traveling there, just yet.
Round 10: Stage 1B (9 of 1 progress, 16 of 20 victory points)
33 threat (First Player)
Hand: D. of Nimrodel x3, Secret Paths, Gildor Inglorion, Song of Kings, Faramir, Erebor Hammersmith x2, Dunedain Quest, Guard of the Citadel
— Aragorn: 13 resources, 2 damage (3 of 5 hit points)
— Theodred: 4 resources, 0 damage (4 of 4 hit points)
— Denethor: 5 resources, 0 damage (3 of 3 hit points)
Staging Area: Dol Guldur Beastmaster, Rauros Falls
Active Location: None
Allies: Henamarth, Faramir, Gleowine, Snowbourn Scout
Radagast’s Cunning is a great card to draw early in the game, before we’ve built up so much willpower, but at this point in the game it doesn’t really matter. Before planning, we will use Henamarth to spy a Dol Guldur Orcs on top of the encounter deck. Normally, this card would be dangerous for one of our questing characters, but we have options, including a certain wizard, for how we deal with the Orcs.
Gleowine will draw us our third copy of Snowbourn Scout. Because we cannot complete the quest while an Emyn Muil location is in play, the two copies of Snowbourn Scout that we have in our hand could end up being essential to finally ending this silly trip. We have a busy planning for once, as we will spend the bounty of resources on the following cards: Gildor Inglorion (5 resources from Denethor), Guard of the Citadel and Dunedain Quest on Aragorn (4 resources from Theodred) and Gandalf (5 resources from Aragorn). The Wizard will lower our threat back down to 28 and give us a skilled combatant to finally take out the Dol Guldur Beastmaster.
 For questing, we will commit Aragorn, Theodred and the poor Snowbourn Scout to the quest. Instead of giving Aragorn one more resource, we will use what we gain from Theodred to ready the Ranger. There will be blood spilled this day.
For staging we reveal the Dol Guldur Orcs, which deal 2 damage to the poor Snowbourn Scout. I really need to send a condolence letter the Snowbourn Scout school, one of these days. As a general, I pride myself in trying to keep all of my characters alive, but once the scout has come into play, his most useful role is really to act as a meat shield for my other characters. The result of questing is no progress, which is just fine at this point in the game.
We will again skip travel, and move on the newly relevant encounter phase. With an engagement cost of only 10, we know that the Dol Guldur Orcs are coming our way no matter what. We also want to take advantage of the momentary appearance of our favorite wizard, so we will first optionally engage the Dol Guldur Beastmaster.
 For combat, Denethor will block the Dol Guldur Beastmaster, with his two shadow cards., Fortunately, A Burning Brand will ensure that we don’t have to worry about any nasty shadow effects. Automatic cancellation effects like A Burning Brand are the gifts that keep on giving.
Faramir will take a break from quest boosting and use his stout 2 defense to help block the Dol Guldur Orcs. The shadow cards for the Beastmaster, Orc Horse Thieves and Pursued By Shadow, are both discarded without effect. The Orcs’ shadow card, Driven By Shadow, would make us discard an attachment from Faramir, but he doesn’t have any attachment to discard.
 The net effect of combat is that both attacks are blocked, and none of our defenders suffered any damage. For counter-attacks, Gildor and Gandalf make quick work of the Dol Guldur Beastmaster and Aragorn slays the Dol Guldur Orcs. We now have a staging area that is free of enemies and we are simply waiting for one more Emyn Muil location so that we can draw this silliness to a close. Because Denethor exhausted to defend, we cannot make use of his ability to see what is coming around the bend. The good news is, even with Gandalf leaving play, we have plenty of allies our to take care of whatever might be next.
Round 11: Stage 1B (9 of 1 progress, 16 of 20 victory points)
29 threat (First Player)
Hand: D. of Nimrodel x3, Secret Paths, Song of Kings, Faramir, E. Hammersmith x2, Snow. Scout x2, Radagast’s Cunning
— Aragorn: 9 resources, 2 damage (3 of 5 hit points)
— Theodred: 1 resource, 0 damage (4 of 4 hit points)
— Denethor: 1 resource, 0 damage (3 of 3 hit points)
Staging Area: Rauros Falls
Active Location: None
Allies: Henamarth, Faramir, Gleowine, Gildor Inglorion, Guard of the Citadel
Like Radagast’s Cunning, Secret Paths is not very useful at this point, but it ultimately doesn’t matter. Our hand is no longer the determining factor for victory, we are waiting on the encounter deck to cooperate. During planning, we trigger Henamarth and see the Shore of Nen Hithoel. The 2 victory points on this card will be enough, along with Rauros Falls, to finish the quest.
 For the quest phase, we have very little in the staging area so we will only commit Aragorn. After revealing The Shores of Nen Hithoel, we again break even on the quest. We will travel the Rauros Falls, knowing that this means that we have to quest with everyone next round.
Next up, it’s time to trigger Denethor to see what is waiting for us over the crest of the next hill. If this card is an enemy, then we can win the game. Unfortunately, it is another copy of Slick Footing, which would surge, so we will put it on the bottom of the encounter deck. This is where this scenario can really get us into trouble, even with enough cards to totally control the board, our threat will inexorably raise while we try to clear all of these locations.
Round 12: Stage 1B (9 of 1 progress, 16 of 20 victory points)
30 threat (First Player)
Hand: D. of Nimrodel x3, Secret Paths, Song of Kings, Faramir, E. Hammersmith x2, Snow. Scout x2, Radagast’s Cunning, Secret Paths
— Aragorn: 10 resources, 2 damage (3 of 5 hit points)
— Theodred: 2 resources, 0 damage (4 of 4 hit points)
— Denethor: 2 resources, 0 damage (3 of 3 hit points)
Staging Area: Rauros Falls
Active Location: None
Allies: Henamarth, Faramir, Gleowine, Gildor Inglorion, Guard of the Citadel
Haldir is a great ally, but at this point he likely won’t be in play by the time this scenario ends. Using Henamarth we find The Necromancer’s Reach waiting for us on the top of the encounter deck. This would not only mean the death of our favorite scrying elf, but it is an all-around terrible card to see when Rauros Falls is the active location. So we will use Denethor right away to put that foul treachery on the bottom of the encounter deck.
We then trigger Gleowine to see if we can find our wizard friend, instead we draw another Dunedain Quest. We will now play the two Snowbourn Scouts to explore the Shores of Nen Hithoel right away. Even after exploring Rauros Falls, if another Emyn Muil location comes up the scenario won’t end, so we have to hope for any enemy.

Because of Rauros Falls, we have to send everyone who is not already exhausted to the quest. Apparently everyone has to help paddle the canoes, or we get pulled over the falls. Before committing anyone to the quest, we will go ahead and trigger Faramir, just for fun. Aragorn, Theodred, Gildor, a Guard of the Citadel, and two Snowbourn Scouts then commit to the quest. We will spend a resource from Aragorn to ready him, but we don’t need to worry about an enemy, because that would mean that we win immediately.
Unfortunately, for staging we get The Outer Ridge, so this wild goose chase gets to continue for at least one more round. We do explore Rauros Falls, which puts us at 21 victory points, and we make 13 meaningless progress on the never-ending stage 1. We will travel to The Outer Ridge and hope for better luck next round.
Round 13: Stage 1B (22 of 1 progress, 21 of 20 victory points)
31 threat (First Player)
Hand: D. of Nimrodel x3, Secret Paths, Song of Kings, Faramir, E. Hammersmith x2, Radagast’s Cunning, Secret Paths, Dunedain Quest
— Aragorn: 11 resources, 2 damage (3 of 5 hit points)
— Theodred: 1 resource, 0 damage (4 of 4 hit points)
— Denethor: 3 resources, 0 damage (3 of 3 hit points)
Staging Area: The Outer Ridge
Active Location: None
Allies: Henamarth, Faramir, Gleowine, Gildor Inglorion, Guard of the Citadel, Snowbourn Scout x2
At this point, it doesn’t really matter what we draw, but it is nonetheless amusing to finally see Song of Wisdom. While it is easy to say that it would have be nice to see this earlier, beating this scenario is much less about what is in our deck, and much more about the shuffle of the encounter deck. Until you see, and can explore, 20 points worth of Emyn Muil locations, it doesn’t really matter what your deck does. This lack of interaction is why The Hills of Emyn Muil is not one of my favorite scenarios.
Just for the fun of it, we will play Song of Wisdom on Aragorn, then play Haldir and Daughter of the Nimrodel. The Daughter will finally heal the 2 damage that has been on Aragorn for almost the entire game. Before the quest phase, we will use Denethor and hope to see an enemy. Instead we see a treacherous fog, which will simply surge, so we put it on the bottom of the encounter deck. Triggering Henamarth to see what our next card is, we find another Treacherous Fog. Good grief, this quest has truly entered the realm of the absurd.

For questing, we will commit Aragorn, Theodred and a Snowbourn Scout (in case of more Orcs). Aragorn readies and we await what will hopefully be our final two encounter cards. Treacherous Fog surges into a Dol Guldur Beastmaster. Our willpower is enough to explore The Outer Ridge and put 4 more progress on stage 1. With 23 total victory points and no more obnoxious Emyn Muil locations in play, we have finally won the game!
Score and Recap
Wandering the Hills of Emyn Muil was very embodiment of frustration. While our deck certainly didn’t help matters by drawing almost exclusively Lore cards – with no resource smoothing, it ultimately was not what held us up. Having to explore 20 victory points worth of Emyn Muil locations ensures that the journey will be a long one, but it is the requirement that no such locations be in play that truly makes this scenario a tedious experience.
While a Spirit deck that includes Northern Tracker is another excellent way to deal with the plethora of hard-to-visit locations, that still doesn’t address the problem that if new locations keep coming of the encounter deck, this quest can go on for a painfully long time. With a total of 31 threat, we ended the game after 12 full rounds (the part of the 13th round does not count against our score). We did not have any damage on our heroes, and we had 23 victory point’s of Emyn Muil locations, so our final score is:
31 (threat) + 120 (rounds) + 0 (damage) – 23 (victory) = 128
I wish that I had something insightful to say about this quest; for once, this bear is at a loss for words. Much like the time that Bombur foolishly tried to drink all of my mead in one gulp, I’m honestly just glad that this whole mess is over. For anyone with specific questions about strategy, feel free to leave comments below. It is also worth pointing out that this scenario becomes almost infinitely easier with Asfaloth, for those who want to attempt it using later cards.
Playing this scenario with only cards printed up to its release in the Shadows of Mirkwood cycle is much more difficult than it is today, with the full card pool. That said, it is clear in retrospect that we should have included Strider’s Path in our deck. Being able to immediately travel to the last Emyn Muil location after it was revealed from the encounter deck would have allowed us to end this scenario a few rounds earlier. Until next time, watch out for trolls, and whatever you do, don’t trust a Dwarf if they try to sell you on a time-share in the Hills of Emyn Muil!


great read through
As a tactics player, leadership/lore decks are always interesting to read.
btw – we will attach A Burning Brand to Denethor, so that we don’t have a repeat of our earlier fiasco with the Beastmaster… for some reason this made me chuckle!
I didn’t realize you had some of your decks posted .O8D! You are the patron saint of bears.
Er, bears who play cards anyway.
You somehow found a way to make The Hills of Emyn Muil interesting, and for that, I applaud you!
I agree with TaleFromTheCards nice work on making such a dull quest sound interesting.
Pingback: Beorn’s Path: Part 12 – The Dead Marshes | Hall of Beorn
Thanks for these fantastic blog posts and for sharing your decks on RingsDB.com. I’ve been using both frequently as I learn the game.
I may be wrong, but it looks like the RingsDB.com version of the deck you built for The Hills of Emyn Muil doesn’t exactly match the one you describe in your blog post. I don’t see Gildor Inglorion listed on RingsDB.com. Am I overlooking that card?
I noticed that discrepancy too and left a comment on that deck. It should be +2 Gildor Inglorion and -2 Dúnedain Warning.
Yes, unfortunately I did not catch the mistake before publishing and there is no way to edit a published deck on RingsDB. Sorry for the confusion.
Hiya. I’m following along still, and I can’t reconstruct how you got from 5 VP to 6 VP during Round 4. Is that a typo? It’s not outcome-determinative, but it does affect the VP calculations for each of the following rounds.
The Highlands (http://hallofbeorn.com/LotR/Details/The-Highlands-THoEM?Lang=EN) have 1 victory point, once we explore them we add that to the 5 victory points on Amon Hen, giving us a total of 6 victory points.
Ah, that’s what I overlooked. Thanks.