
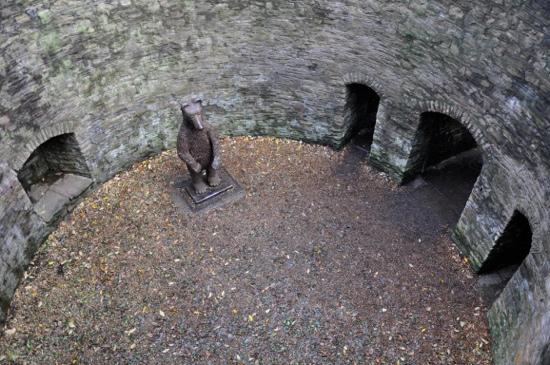
Welcome back to Beorn’s Path! After some time off to relax, I have emerged from my cave and am ready to resume my journey through Middle-Earth. For those that have not had a chance to follow Beorn’s Path up to this point, I encourage you to go back and read about all of the adventures that brought us here. Our next stop on Beorn’s Path takes us into the depths of the abandoned Dwarven Kingdom of Khazad-dûm.
 Khazad-dûm was the first deluxe expansion released for this game, so it only seems fitting that we would create a Dwarf-themed deck to play against the scenarios therein. As always with Beorn’s Path, decks will only include cards that were released as of the scenario being played. Since we have mastered some of the more basic concepts of deck building, we are going to be a bit more ambitious and try out a three-sphere deck. Building and playing a deck with heroes from 3 different spheres is not easy, but Khazad-dûm gives us a hero in Bifur which makes this a much less daunting task.
Here is the deck list that I will be using for the first Khazad-dûm scenario: Into the Pit. As with past installments, we may be tweaking these decks as we progress through the scenarios, but the basic deck design should stay consistent. One last note for those with only 1 copy of the Core Set. I have included 3 copies of key cards like Steward of Gondor and Feint even thought the Core Set only has 2 copies of these cards.
The reason for this is simple: I want to make the best deck that I can make. Earlier versions of this deck that limited themselves to 2 copies of the key cards did not play consistently enough in playtesting. For those that want to play use this deck, but don’t want to buy a second copy of the Core Set, I encourage you to proxy the missing cards. Alternatively, you can show Caleb and Matt your appreciation and buy a second copy.
Heroes:
Dain Ironfoot (RtM)
Thalin (Core)
Bifur (KD)
Allies: 26
Erebor Record Keeper (KD) x3
Gondorian Spearman (Core) x3
Veteran Axehand (Core) x2
Erebor Hammersmith (Core) x3
Miner of the Iron Hills (Core) x3
Gléowine (Core) x3
Daughter of the Nimrodel (Core) x3
Longbeard Orc Slayer (Core) x3
Gandalf (Core) x3
Attachments: 14
Dúnedain Warning (CatC) x3
Dwarrowdelf Axe (KD) x2
Protector of Lórien (Core) x3
Narvi’s Belt (KD) x3
Steward of Gondor (Core) x3
Events: 10
Parting Gifts (AJtR) x2
Sneak Attack (Core) x3
Feint (Core) x3
Quick Strike (Core) x2
Setup and Opening Hand
Our opening hand is as follows: Gondorian Spearman, Steward of Gondor, Daughter of the Nimrodel, Dúnedain Warning, Miner of the Iron Hills and Longbeard Orc Slayer. This is a perfect opening hand, so we will most certainly keep it. The key to a multi-sphere deck is always going to be resources, and having Steward of Gondor to start the game will ensure that we have enough resources to go around. Bifur will also benefit, as there is more likely to be a spare resource on one of our other heroes that we can transfer to him.

For setup we will attach Cave Torch to Thalin and reveal one card from the encounter deck: Branching Paths. We can expect to see a fair number of locations in these scenarios, and all things considered this is one of the more benign ones. The forced effect that triggers after we explore it can actually be a benefit, as it allows us to move some potentially deadly treacheries to the bottom of the encounter deck. The one sphere that our deck lacks is Spirit, so treacheries are one of the few things that can pose major problems. In any case, since Branching Paths is a Dark location, we also have the option of using the Cave Torch to explore it without having to travel there.
Round 1: Stage 1B (0 of 7 progress)
27 threat (First Player)
Hand: Gondorian Spearman, Steward of Gondor, Daughter of the Nimrodel, Dúnedain Warning, Miner of the Iron Hills and Longbeard Orc Slayer
— Dain: 1 resource, 0 damage (5 of 5 hit points)
— Thalin: 1 resource, 0 damage (4 of 4 hit points)
— Bifur: 1 resource, 0 damage (3 of 3 hit points)
Active Location: East Gate (0 of 7 progress)
Staging Area: Branching Paths
To start the game we draw a second copy of Daughter of the Nimrodel. Extra healing is not necessarily a bad thing, as we can expect quite a bit of combat in this scenario. With swarms of enemies a very real potential, we may even have to take an undefended attack at some point. Having the Silvan along for the journey should make these attacks much less dangerous.
To start off planning we are going to immediately exhaust Cave Torch to explore Branching Paths. Exhausting the torch means that we have to discard the top card of the encounter deck: Zigil Mineshaft. Since this is not an enemy we can go ahead and leave it in the discard pile. The forced on Branching Paths makes us look at the top 3 cards of the encounter deck: Burning Low, Stairs of Náin and Signs of Conflict. We will reveal Burning Low and put the other two on the bottom of the encounter deck. Since Burning Low’s effects only last until the end of the planning phase, it will have no meaningful impact right now. Since we need two resources on Dain before we can play the Steward of Gondor, we will go ahead and save up resources for this round.
For the quest phase we will exhaust and commit Bifur and Thalin for a total of 5 willpower.
At staging get a Goblin Follower. It takes 1 damages and engages us immediately (we count as the first and last player in a solo game). Ordinarily, we would not be able to engage enemies while the East Gate is in play, however the Goblin Follower’s specifically circumvents the effects of the Gate as he sneaks up behind us.
Already, we can see the benefit of Thalin’s ability as the Goblin has been damaged without us having to do a thing. With nothing in the staging area, our 5 willpower translates to 5 progress on East Gate, so hopefully we will be able to clear that location next round. It is essential for us to clear this first gate quickly, as waiting could be fatal. Having enemies and locations pile up in the staging area before we have had time to muster our allies would mean that we never make it past the first stage.
For combat we deal a shadow card to the Goblin follower and exhaust Dain to declare his an a defender. The shadow card is a Goblin Scout so Dain does not take any damage from the attack. With no characters left to counter-attack, we will leave the Goblin where he is and wait patiently for help to arrive.

Round 2: Stage 1B (0 of 7 progress)
28 threat (First Player)
Hand: Gondorian Spearman, Steward of Gondor, Daughter of the Nimrodel x2, Dúnedain Warning, Miner of the Iron Hills and Longbeard Orc Slayer
— Dain: 2 resources, 0 damage (5 of 5 hit points)
— Thalin: 2 resources, 0 damage (4 of 4 hit points)
— Bifur: 2 resources, 0 damage (3 of 3 hit points)
Active Location: East Gate (5 of 7 progress)
Staging Area: Empty
Engaged: Goblin Follower (3 of 4 hit points)
For our second card we will draw another Minor of the Iron Hills. Again, this duplication is not necessarily a bad thing as Watchful Eyes is a very dangerous Condition attachment, so it will be good to have a solution if that card comes up. For planning we will pay 2 from Dain to given him Steward of Gondor. This is not the most thematic attachment for our King Under the Mountain, but Dwarf-themed resource acceleration was simply not available at this point in the game. We will exhaust our Title attachment and add 2 resources back to Dain’s resource pool.
Next, we will pay 2 from Thalin to play Gondorian Spearman. The Spearman combined with Thalin’s ability is going to give us a tremendous advantage in this scenario. Many of the Goblins have only 2 hit points, so as long as they are revealed while Thalin is questing, the Spearman will be able to kill them without having to risk dangerous shadow effects. Lastly, we will transfer 1 resource from Dain to Bifur so that we have 3 Lore resources to spend. We will use these to play a Daughter of the Nimrodel. With healing in play, we can defend with Dain and worry less about shadow effects that might boost an enemy’t attack strength.
Entering the quest phase, we will again commit Bifur and Thalin for 5 willpower. The staging step brings us a nasty surprise: Signs of Conflict, which raises our threat to 30 and surges into a Goblin Swordsman. The Swordsman does take 1 damage from Thalin. With 5 willpower against 1 threat, we make 4 total progress. The first 2 of this progress explores East Gate, and it is added to our victory display. Once East Gate leaves play, we add the First Hall to the Staging Area. The other 2 progress goes to stage 1B where we have 5 progress left. We’re not so concerned with progress on the stage itself, since we have to clear First Hall and Bridge of Khazad-dûm before we can move on to the next stage.
For our travel phase, we will raise our threat to 33 to make First Gate the active location. We could wait to do this, but our threat will only get higher, and we need to be aggressive moving through this scenario. The more that we let locations pile up in the staging area, the harder that it will be to make progress. For the encounter phase, the Goblin Swordsman engages us.
During combat, our Gondorian Spearman will get to show his value. By declaring the Spearman as a defender against the Goblin Swordsman, the Goblin is killed instantly – before it’s shadow card is even resolved. Dain will again block the Goblin Follower. The shadow card for that attack is another Signs of Conflict, so our threat climbs ever higher to 35. We started this round at 28 threat – all of these doomed effects have put us in danger of not having enough time to make it through this scenario alive.

Round 3: Stage 1B (2 of 7 progress)
36 threat (First Player)
Hand: Daughter of the Nimrodel, Dúnedain Warning, Miner of the Iron Hills x2 and Longbeard Orc Slayer
— Dain: 4 resources, 0 damage (5 of 5 hit points)
— Thalin: 1 resource, 0 damage (4 of 4 hit points)
— Bifur: 1 resource, 0 damage (3 of 3 hit points)
Active Location: First Gate (0 of 2 progress)
Staging Area: Empty
Engaged: Goblin Follower (3 of 4 hit points)
For the third round, we draw another copy of Dúnedain Warning. Sometimes I wonder just how random the “shuffle” feature on OCTGN really is. In any case, we will be able to transform Dain into a fantastic defender, which will come in useful if we can survive to the later rounds. For planning we will transfer one resource from Dain to Bifur. We can then pay 2 resources from Bifur to play Miner of the Iron Hills. We don’t have any Condition attachments to target with his ability, but we need his as another character to help dealing with enemies.
For the quest phase we will commit Thalin and Miner of the Iron Hills for a total of 3 willpower. The idea here is to hold back Bifur as a defender so that we can hopefully start putting some damage on our engaged enemy. For staging we reveal another Goblin Follower. Now we are starting to see some of the swarming that this scenario can bring. The follower takes 1 damage from Thalin and engages immediately.
 Our 3 willpower against an empty staging area means that we make 3 progress. The first two progress explores First Hall, adding Bridge of Khazad-dûm to the staging area. The final 1 progress goes on stage 1B leaving us 4 progress left for this stage. We are going to skip traveling for now. We cannot risk going to the bridge just yet, we need a few more allies in play before we can afford to not be able to play cards.
For combat, we are going to take a risk and not declare a defender for one of these attacks. With a Daughter of the Nimrodel in play, as long as an attack does not deal more than 4 damage, we can survive it without losing a hero. For the undefended attack, the shadow card is Stairs of Náin, which forces us to exhaust Daughter of the Nimrodel. The three damage from this undefended attack will be dealt to Dain.

For the next attack, we will defend with Bifur. The shadow card for this attack is Dark and Dreadful which deals 1 damage to Bifur. The 3 attack strength of the Follower also deal 1 damage to Bifur so he is close to death’s door. We took a risk here with both of these attacks and fortunately we survived without losing a hero. The fact of the mater is that this game involves hard decisions. Barring extremely lucky draws from the encounter deck, you will find yourself in situations where you have to take risks. This is what makes this game fun. For our counter-attack, Dain and Gondorian Spearman will attack the first Goblin Follower for 3, dealing 1 damage to him.

Round 4: Stage 1B (3 of 7 progress)
37 threat (First Player)
Hand: Daughter of the Nimrodel, Dúnedain Warning x2, Miner of the Iron Hills x1 and Longbeard Orc Slayer
— Dain: 6 resources, 3 damage (2 of 5 hit points)
— Thalin: 2 resource, 0 damage (4 of 4 hit points)
— Bifur: 1 resources, 2 damage (1 of 3 hit points)
Active Location: None
Staging Area: Bride of Khazad-dûm
Engaged: Goblin Follower (2 of 4 hit points), Goblin Follower (3 of 4 hit points)
For the resource phase we draw an Erebor Hammersmith. This is another useful ally that will help us to get numerical superiority against this scenario. Though we don’t have any attachments in our discard pile to take advantage of his ability, we can definitely use another Dwarf to help us fight off all of these Goblins. We will transfer 1 resource from Thalin to Bifur. Next, we will pay 4 resources from Dain to play Longbeard Orc Slayer.
 After the Orc Slayer enters play, we can trigger his response to deal 1 damage to each Orc in play. This means that one of Goblin Followers only has 1 hit point remaining – a perfect target for our Gondorian Spearman. Lastly, we will pay 2 resource from Bifur for Erebor Hammersmith. Again, we can’t take advantage of his ability, but having an extra ally is useful.
For the quest phase we will once again commit Thalin and Bifur for 5 willpower. Staging brings us another copy of Branching Paths. Since it is a Dark location, we could use Cave Torch to explore the Branching Paths. However, we already have our hands full with engaged enemies and wounded heroes, so in this case we will play a bit more conservatively. Our 5 Willpower against 5 threat in the staging area means that we do not make any progress this round. For travel, we will go to Branching Paths to get that threat out of the staging area.

For combat, the Follower with 3 damage will be blocked by our Gondorian Spearman, and the hapless Goblin dies immediately. The shadow card for that attack would have been a Goblin Swordsman, an annoying card that contributes to the enemy swarm in this scenario. Because the Spearman killed the attacked before the attack could resolve, we are spared from these and other dangerous shadow cards. The power of the Spearman underscores the importance of having direct damage or shadow cancellation for this scenario.

The other Follower, with only 2 damage is blocked by our Erebor Hammersmith. With any luck, it might survive this attack. Sadly, luck has run out for our Erebor Hammersmith. The shadow card is Burning Low, which means that the Follower is attacking for 5 and kills our defender. With Dain ready, our Longbeard Orc Slayer and and Miner of the Iron Hills can counter-attack and kill the other follower. We are finally getting this scenario under control by killing off our engaged enemies.
 Daughter of the Nimrodel will now exhaust to heal 2 damage from Bifur. Next, we will exhaust Cave Torch to put 3 progress on Branching Paths. Again, we could have done this earlier in the round, but it would have run the risk of another enemy engaging. After the Cave Torch exhaust we discards Fouled Well, which is not an enemy so it is not added to the staging area.
In addition, exploring Branching Paths means that we have to look at the top 3 cards of the encounter deck. Watchful Eyes, Crumbling Ruin, Goblin Swordsman are on the top of the encounter deck. Since we have a Miner of the Iron Hills in play and Dain is ready we can safely attach Watchful Eyes to our King and put the other two cards on the bottom of the encounter deck.
Round 5: Stage 1B (3 of 7 progress)
38 threat (First Player)
Hand: Daughter of the Nimrodel, Dúnedain Warning x2, Miner of the Iron Hills
— Dain: 5 resources, 3 damage (2 of 5 hit points)
— Thalin: 2 resource, 0 damage (4 of 4 hit points)
— Bifur: 1 resources, 0 damage (3 of 3 hit points)
Active Location: None
Staging Area: Bridge of Khazad-dûm
Our fifth round begins with us drawing Gléowine. As we move forward he should help us to draw more allies so that we aren’t left with too many unspent resources on our heroes. For planning we will transfer 1 resource from Thalin to Bifur. Next we will pay 2 for Miner of the Iron Hills and discard Watchful Eyes from Dain. After that, we will pay 2 resources from Dain to attach both Dúnedain Warnings to him. With a defense of 5, and healing in play, Dain should be able to handle even the most powerful of attackers.
 For the quest phase, we will commit Bifur, Thalin and Miner of the Iron Hills for a total of 6 willpower. During the staging step, we reveal a Zigil Mineshaft. We do not want to leave that much threat in the staging area, so we will exhaust Cave Torch to put 3 progress on the Mineshaft. This forces us to discard Cave In, which is not an enemy, so we don’t have to add it to the staging area. So far, we have been fortunate with our use of the Cave Torch.
With 3 progress on the Zigil Mineshaft, we will raise our threat to 40 to place 2 more progress on the Mineshaft to explore it. Our 6 willpower against 3 threat in the staging area means that we make 3 progress on stage 1B. This leaves us with only 1 progress left to make on this stage, but we still need to clear our third unique location. For travel, we are finally ready to make Bridge of Khazad-dûm the active location. It is now of vital importance that we quest aggressively, because we won’t be able to play any cards while we are on the bridge. Before the end of the round, we will exhaust Daughter of the Nimrodel to heal 2 damage from Dain Ironfoot.
Round 6: Stage 1B (6 of 7 progress)
41 threat (First Player)
Hand: Daughter of the Nimrodel, Gléowine
— Dain: 6 resources, 1 damage (4 of 5 hit points)
— Thalin: 2 resource, 0 damage (4 of 4 hit points)
— Bifur: 1 resources, 0 damage (3 of 3 hit points)
Active Location: Bridge of Khazad-dûm
Staging Area: Empty
Four round six, we draw another copy of Longbeard Orc Slayer. This ally will always be a welcome sight in the Khazad-dûm scenarios. With so many Orcs roaming around, his ability is quite powerful – particularly in concert with Thalin. As long as Dain is ready, the Orc Slayer’s 3 attack is not to be underestimated either. For planning we will transfer 1 resource from Dain to Bifur. Unfortunately, there is nothing else that we can do this round as we are stuck on the bridge.
For questing, we will commit Bifur, Thalin, both copies of Miner of the Iron Hills and a Daughter of the Nimrodel. Our total of 8 willpower should be enough to allow us to clear the bridge and finally move on to the next stage. The staging step reveals a Goblin Swordsman, which immediately takes 1 damage. Our 8 willpower against the 1 threat for the Swordsman means that we make 7 progress.
 This allows us to explore the Bridge and put 4 progress on stage 1B. We add the Bridge of Khazad-dûm to our victory display an immediately advance to stage 2A. This forces us to add Patrol Leader to the staging area.
The Patrol Leader can be a particularly troublesome enemy, as every there is about a 30% chance that any damage dealt to him is immediately cancelled. Although we can pass stage 2B by making 11 progress, it is preferable to clear the board of enemies and skip directly to the final stage.
Patrol Leader is not going to make that task easy. For the encounter phase, we will engage both Patrol Leader and the Goblin Swordsman. Our current threat of 41 means that we will be engaging most enemies from here on out. The hope is that by this point we have enough of an ally army to survive whatever the encounter deck throws at us.
To start off combat, the Gondorian Spearman will block the Goblin Swordsman and kill it immediately. The shadow card was Sudden Pitfall, which would have killed our defender and caused an undefended attack. If not for Thalin and Gondorian Spearman, we would not stand a chance on this scenario. Our super-defender Dain will block Patrol Leader. The shadow card is Cave In, so Dain does not take any damage.

Round 7: Stage 2B (0 of 11 progress)
42 threat (First Player)
Hand: Daughter of the Nimrodel, Gléowine
— Dain: 8 resources, 1 damage (4 of 5 hit points)
— Thalin: 3 resource, 0 damage (4 of 4 hit points)
— Bifur: 3 resources, 0 damage (3 of 3 hit points)
Active Location: None
Staging Area: Empty
For our seventh round, we draw Feint. Perfect timing, we now have the perfect solution to Patrol Leader. We just have to hope that we get lucky and the damage that we deal to him is not cancelled. For planning, we pay 4 from Dain for Longbeard Orc Slayer. This deals 1 damage to Patrol Leader, and we are now forced to discard the top card of the encounter deck to see if the damage is cancelled. Signs of Conflict is a nasty card, particularly with our current threat above 40, so it is a welcome to sight to see it discarded here. As an added bonus, Patrol Leader does take the damage from the Orc Slayer’s effect.
Next we will pay 2 resources from Bifur to put Gléowine into play. Flush with resources, we are looking for a wizard to help us finish off this quest. We will exhaust Gléowine right away to draw another card. We draw Erebor Record Keeper. While not a wizard, this is a very helpful card as it can be used to ensure that Dain stays ready. Lastly, we will transfer 1 resource from Dain to Bifur, so that we can use the Record Keeper if needed.
This quest phase will be a bit different as enemies cannot be revealing during stage 2. This is the one time when we do not need to commit Thalin to the quest. We will instead send Bifur and a Miner of the Iron Hills. This total of 4 willpower should be enough to keep us from having to raise our threat.
 For staging we reveal Cave In. Since there is no progress to remove, it surges into Branching Paths. Our 4 willpower against the 2 threat in the staging area means that we make 2 progress on stage 2B. For Travel we will make Branching Paths the active location. Being able to put potentially devastating cards on the bottom of the encounter deck makes Branching Paths a rather helpful card in this scenario.
For combat we will pay 1 resource from Thalin to play Feint on the Patrol Leader. With our enemy unable to attack this round, we will send both Longbeard Orc Slayers and Thalin to counter-attack for a total of 9 strength. Now comes the moment of truth: will this damage be cancelled? With a sigh of relief, we discard Watchful Eyes from the top of the encounter deck so the damage is not cancelled and Patrol Leader is killed. Since there are no enemies in play, we immediately advance to stage 3. Before the end of the round, we will exhaust Daughter of the Nimrodel to heal the last of the damage on Dain Ironfoot.

Round 8: Stage 3B (0 of 12 progress)
43 threat (First Player)
Hand: Daughter of the Nimrodel
— Dain: 5 resources, 0 damage (5 of 5 hit points)
— Thalin: 2 resource, 0 damage (4 of 4 hit points)
— Bifur: 0 resources, 0 damage (3 of 3 hit points)
Active Location: Branching Paths
Staging Area: Empty
At 43, our threat is dangerously high. With the doomed cards in this scenario, we need to try to finish this stage as quickly as possible. It is not safe to assume that we will have 7 more rounds in which to make it out of the pit. Unfortunately on stage 3, our heroes do not collect resources during the resource phase. Steward of Gondor and Bifur’s ability will mean that we can still play some cards, but we will need to rely heavily on what we already have in play.
We do still get to draw a card, in this case we add a second copy of Erebor Record Keeper to our hand. We will transfer 1 resource from Dain to Bifur and use it to pay for the Erebor Record Keeper. Thanks to Dain, the record keeper has 2 willpower that it can contribute to the quest. With little time remaining, questing aggressively is vital if we hope to survive.

For the quest phase we commit the following: Bifur, Thalin, 2x Record Keeper, 2x Miner, Daughter and Gléowine for 13 total willpower. For staging we reveal another Patrol Leader. While killing him may prove troublesome, at this point we do not need to clear out all of the enemies, we just need to get 12 progress on this stage. We discard a card from the top of the encounter deck and Lightless Passage means that the 1 damage from Thalin is not cancelled.
Our 13 willpower nets us 10 progress against the 3 threat from Patrol Leader. We could use the Cave Torch to explore the Branching Paths before resolving the quest. However, there is a risk that this would reveal another enemy, and not net us any less threat in the staging area. Instead we will remain patient and content in the knowledge that we should be able to clear this stage completely on our next turn.
The first 3 of this progress explores Branching Paths so we look at the top 3 cards of the encounter deck: 2 copies of Signs of Conflict and 1 Burning Low. Once again, Branching Paths has worked to our benefit. Surging Signs of Conflict could have been fatal here, instead we will reveal Burning Low and stick those doomed cards on the bottom of the encounter deck. Since we have already resolved the quest, the extra threat from Burning Low is harmless. Finally, we put 7 progress on stage 3B. We are 5 progress away from victory.

For the encounter phase we must engage the Patrol Leader. Fortunately, Dain should be more than capable of handling the Patrol Leader’s attack. We exhaust the King Under the Mountain as our defender and reveal Fouled Well as a shadow card for the Patrol Leader’s attack. Dain does not take any damage.
Next, we will exhaust both Longbeard Orc Slayers and the Gondorian Spearman to attack the Patrol Leader for 5. A Goblin Scout is discarded from the top of the encounter deck so all damage from their attack is cancelled. Patrol Leader is definitely one of the more obnoxious enemies in the game. Fortunately, we should be able quest out next round and his continued presence will not be an issue.
Round 9: Stage 3B (7 of 12 progress)
44 threat (First Player)
Hand: Daughter of the Nimrodel
— Dain: 6 resources, 0 damage (5 of 5 hit points)
— Thalin: 2 resource, 0 damage (4 of 4 hit points)
— Bifur: 0 resources, 0 damage (3 of 3 hit points)
Active Location: None
Staging Area: Empty
Engaged: Patrol Leader (3 of 4 hit points)
For what should be our final round, we again do not collect resources. This is of little importance, as we have by now amassed and army of Dwarven allies to carry us to victory. We draw Narvi’s Belt, a useful attachment when Dain is the only hero with a means for collecting new resources. We spend 2 resources from Dain to give him Narvi’s Belt. We then exhaust the Belt and choose to give Dain access to the Lore sphere for the remainder of the phase. Finally, we will spend 3 more resources from Dain to play our second copy of Daughter of the Nimrodel. At this point, another ally is probably overkill. Still, it is better to be safe than sorry.
For the quest phase we will commit 14 willpower in the form of Bifur, Thalin, both Record Keepers, both Miners, both Daughters of the Nimrodel and Gléowine. This should be more than enough willpower to put the necessary progress on the final stage and win us the game. For staging we reveal Many Roads, which shuffles all of the locations in the encounter discard pile back into the encounter deck, then surges. Our final card for staging is another copy of Branching Paths. With 14 willpower against 2 threat in the staging area, we make 12 more progress on stage 3 and win the game.

Conclusion
The Khazad-dûm scenarios can be quite challenging, especially if we get an unlucky combination from the encounter deck. With some truly horrific shadow cards, even a relatively harmless enemy can suddenly ruin all of our best-laid plans. As we saw, one of keys to this scenario was that most the enemies are not very hearty. By using Thalin and Gondorian Spearman to maximum effect, we were able to avoid the worst of the combat effects that this scenario was trying to use to punish us.
Dealing with swarms of enemies can be challenging for any deck, so we need to use every trick at our disposal to avoid being overrun by hordes of Goblins. As we move deeper into Moria, we might make minor changes to this deck, but overall it seems to be handling things quite well. We were able to use resource acceleration and Bifur’s ability to ensure that we weren’t stuck with too many cards in our hand that could not be used. The advantage of a multi-sphere deck was also highlighted in this game as we had access to some very powerful cards to help us out of tight spots. Check back soon, as we continue our adventure and move on to the Seventh Level.


Fantastic. Having just finished the Mirkwood cycle myself I looking forward to more progression decks and playthroughs. I have found the 10th Nazgul stuff very handy.
Glad you’re continuing this! Too bad you can’t use cram for the King…..
Do you plan to continue Beorn’s Path all the way to the newest releases?
Yes, it an interesting challenge to go back and play a Dwarf deck without all of the new toys that we got in Dwarrowdelf and The Hobbit saga expansions. I would like to continue Beorn’s Path all the way to current releases, but it takes quite a bit of time to write up the play reports, so I don’t know if I will ever catch up.
I tried to something like this once and it took so long and I only got half way though! I’m sure it takes a very long time. Whatever you can do will be very much appreciated.
Excellent!
Both an enjoyable and educational read.
Thanks for the continuation !! Great job
Yay for the return of Beorn’s Path! Into the Pit is actually a deceptively challenging quest, even in its non-Nightmare form, because of some nasty treacheries and shadow effects that make risk management even more important (and risky) than normal.
Another hurrah for the return of Beorn’s Path. As a relatively new player (just started near the beginning of the year), I started with the goal of only doing saga expansions. I’m now failing miserably, and after picking up Khazad’Dum for more dwarf cards, I’ve started at the beginning and am following your Path through the Shadows. I just recently purchased and am doing Conflict at the Carrock, while saving enough money to pick up Journey to Rhosgobel and The Road Darkens if it releases someday soon!
And I have to admit, while I”m excited you’re continuing, I’m personally excited to go through the Shadows path and then start taking those skills and trying it out on my own as well. I tend to be impatient when it comes to deckbuilding: I just want to play! But I’m hoping to cultivate a love and appreciation for creating decks and testing them out. Easier said then done when you’re married with three kids! 😀
Finally, a question: I heard a lot of reference to proxying missing cards. While I understand the idea, how do most people go about doing it? I just don’t know how I’d get the extra cards without them being obviously out of place in my deck. Thanks for the guides and for being another part of why I love this great game.
Thanks for the kind words, Mike. As someone who is married and has more than enough adult responsibilities, I can certainly relate to the challenge of finding time for fun and games.
As for proxies, I would say that it is actually easier to use very different cards as proxies, to make it obvious when you draw them that they do not represent what is on the card. For example, if you you need to proxy two extra copies of Feint in a Tactics deck, you could use two copies of Power in the Earth from the Core Set. Since it is a Spirit Attachment, and a card that you would never find in a Tactics deck, it will be obvious when you draw it that it is a proxy for another card. If you use the same card as a proxy, you could even write on the face of the card with a permanent marker the name of the card it represents. If you find yourself changing your proxies often, or you dislike the idea of defacing a card, you can instead write a list in a note card and keep it next to you while you play. For example, something like this: Power in the Earth = Feint, Stand and Fight = Gondorian Spearman, Northern Tracker = Citadel Plate.
One last option, if you find using other cards to be too distracting, would be to get color photocopies or print-outs of the cards that you wish to proxy. You could print these on a thin paper stock, then use card sleeves and slide them in front of the actual card, so that you cannot see what the card originally was. In any case, there are a lot of ways to proxy cards, feel free to experiment and find the approach that works best for you. Good luck on your adventures in Middle-Earth!
Great stuff, thank you!
Thank you Beorn!
I’ve been following the path and it has proven really good for learning the game 🙂
I know that it is time consuming to report the games with so much detail, and your effort is really appreciated.
Maybe a compromise solution to catch up could be to only post the deck (assuming only to have the released cards at the time) with a brief description of the strategy to use it?
Also, I find it quite enjoyable when I manage to get my second half to play along, but sometimes I struggle to balance 2 decks. Have you got any recommendations on deck building for 2 players?
Have you considered a “parallel path” for 2 players, other than for Escape from Dol Guldur?
I found that for the Mirkwood cycle, the two decks you introduced work well together, but going forward I see too many possibilities and either we spend our “playing time” trying to remove cards from two 70+ cards decks (typical “but this card is really good, better leave it” situation) or we get our butt’s kicked by the encounter deck… ; )
In any case, thank you for all the effort and for providing a great resource for all the fans of the game out there!
Two victories with your cool deck!
First try, poor Thalin died on the way out…
Second game, threat was really high. I consider myself lucky because one of the shadow cards was a “sudden pitfall” on an undefended attack, so no characters died since it targets defending characters (am i right?). I thought about tapping Dain for defense, but i selected no defenders in the end since the attack value of the monster was only 1, so just a scratch. That would have been a sad end for the dwarf lord at the bottom of a cold, damp pit if he would have faced that monster.
Treacherous Khazad-dûm…
Nice card synergy and fun management of 3 different spheres.
You have plans on making one for the next scenario?
Well done! You are correct about Sudden Pitfall – that is one of the few times in the game when an undefended attack is the safer option. I’m not sure about continuing Beorn’s Path. Recording the play sessions and writing the articles is time consuming, and I want to focus on other aspects of the game. Thanks for the feedback, and I’m glad that Beorn’s Path has been helpful.
Ok. If you ever do keep following the path, i’ll make sure to try the next scenario. I could try my hand at deck building too.
Thanks.
Greetings from the North! First and foremost, many thanks for creating this blog. The Beorn’s path really helped me to discover my own play style, and it deepened what I find interesting and enjoyable in the game. You offered the best stepstone I could have wanted to discover. Also, thanks for all the effort you put here and the time you take to share your passion with the community (I’m thinking of the Gray Company show).
This being said, without would be the best trispheres card selection with just one core set? Even if it won’ be as good as the one you described above, what could that be?
What about a third Veteran Axehand, a third Dwarrowdelf Blade, a third Parting Gift, 2 valiants sacrifice, the Silvan Scout in the Core (Hammarth)?, 2 Dwarven axe, and maybe a couple of Dunedain’s Mark and / or quest, and maybe a good final-stage card like Grim Resolve? I’ve tried it, but it was never consistant enough…
Thanks for your kind words, Benoit! With only one Core Set, you lose the following 8 cards:
1x Erebor Hammersmith
1x Miner of the Iron Hills
1x Gleowine
1x Longbeard Orc Slayer
1x Protector of Lorien
1x Steward of Gondor
1x Sneak Attack
1x Feint
Here are the replacements that I would suggest:
1x Henamarth Riversong (Core)
1x Veteran Axehand (Core)
2x Longbeard Map-maker (CatC)
1x Dwarrowdelf Axe (KD)
1x Parting Gifts (AJtR)
2x Blade Mastery (Core)
For quests that require more willpower, consider 1 copy of Celebrian’s Stone and a couple of copies of Dunedain Quest (instead of the Axe and the two copies of Blade Mastery). Good luck, sir.
Terrific job once again, Mr Bear! I specially appreciate the screenshots, that make the description of the game even more understandable. Huge investment of energy and time in these installments, which I really thank.
By the way, you develop very nice and inspiring decks, and the games are pretty well played with them, taking good decisions in critical moments. Congratulations!
Thanks for the kind words! I’m glad that you have enjoyed this journey.
Beorn just to let you know that your decks are still playing strong!! Picked up Lotr lcg at Christmas after being absent from these games for almost 25 years since my teens….Absolutely confused to start with but with great insight from yourselves and others what a wonderful game this is. Just completed this quest succesfully for the second time….a nice feeling given the headache of JDtA.
I’m glad to hear that, Jason. Thanks for your feedback, and best of luck on your journeys through Middle-earth.
Narvis belt only lasts for the phase
Correct. I fixed the error in the text.