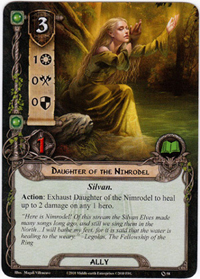
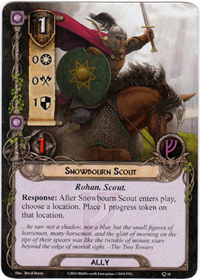
In our previous stop along Beorn’s Path, we tuned our Leadership/Lore deck in preparation for a Journey Along the Anduin. Knowing that we have to face, and defeat, the dreaded Hill Troll has impacted our strategy. Specifically, we identified a need for more card draw to find our solutions to the troll, since he starts in the staging area and we only have a few rounds before he will engage us. Also, taking lessons learned from our first playtesting session, we decided to add more healing and location control in the form of an extra copy of Daughter of the Nimrodel and Snowbourn Scout.
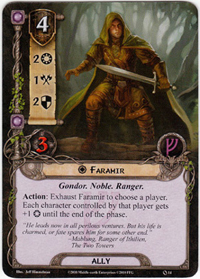
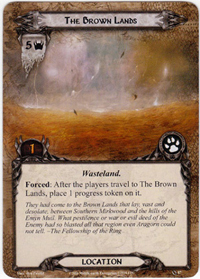
Even though our Journey Along the Anduin will include some high-threat locations, like The Brown Lands, actually removing these locations with the Scout makes more sense than just canceling their threat for one round with Secret Paths. Also, because the second stage reveals an additional encounter card during the staging step, we want more allies in general to help form a questing army. Faramir’s ability in particular, will be all the more vital once we’ve defeated the Hill Troll and are ready to race to the finish line.
As for the troll, we do have a solution for dealing with him. If you’ll recall, his ability means that excess damage that he would deal, beyond the remaining hit points of defender, must be taken as a threat increase. This is something that we want to avoid at all costs, but his attack of 6 and high hit points make the troll a formidable foe. Unfortunately, we are relying on two cards for Troll-control, so we may not be able to get the full combo before our threat reaches 30 and we are forced to engage the troll.
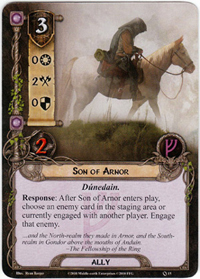
Still, as long as we can trap the troll within our first few rounds we should be all right. To recap from our last article, the combination that we are looking for involves playing Son of Arnor to force the Hill Troll to engage us during the planning phase, then immediately tripping him in a Forest Snare. This would ensure that the hideous creature never gets a chance to attack. If we can pull this off, we won’t risk the loss of Aragorn defending, and as importantly, we won’t have to deal with the large threat increases that come from chump blocking this enemy.
Setup and Opening Hand
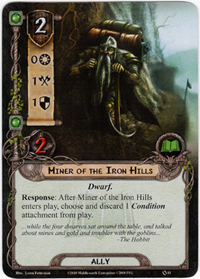
Drawing our opening hand of six cards, we find Gandalf, Sneak Attack, Son of Arnor, Secret Paths, Erebor Hammersmith and a Guard of the Citadel. While getting multiple uses from Gandalf might seem great, this hand is very uneven. With no card draw, healing, or resource generation, we will be hard pressed to establish any of our strategies for successfully completing this quest. Moreover, we are really hoping for a Forest Snare to have a solution in hand for the impending troll attack. So we will take a mulligan and draw a new hand of six cards. Our second hand is a close to perfect as we could want: Miner of the Iron Hills, Son of Arnor, Protector of Lorien, Daughter of Nimrodel, Faramir and Steward of Gondor. We will still need to scramble for that trap, but at least this hand gives us a lot more to work with while we do so.
For scenario setup we reveal one card from the encounter deck. Necromancer’s Reach is revealed, which fortunately has no effect since no characters are exhausted at this point. It’s always good to see treacheries like this revealed when they have little or no negative impact. As an added bonus the treachery means the only threat starting in the staging area will be the 1 from the troll. This is helpful because our decks starts slowing when it comes to questing. Completing the setup, since there is no Hill Troll in play, we search through the encounter deck to find one, then add it to the staging area.
Round 1: Stage 1B – Threat 28
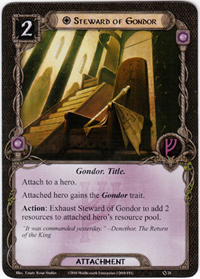
 After collecting one resource on each hero, we draw our first card of the game: Guardian of the Citadel. Nothing spectacular, but he should come in handy later, when we want our ally army to finish off the scenario. Moving on to planning we play Steward of Gondor on Denethor and immediately exhaust it for two additional resources. This allows us to and pay for Daughter of Nimrodel. After spending our entire Passage Through Mirkwood on a vain quest for repeatable healing, we have it in the first round of our latest quest. Knowing that Aragorn can afford to take undefended attacks from smaller enemies will free him up to counter-attack and should greatly ease combat.
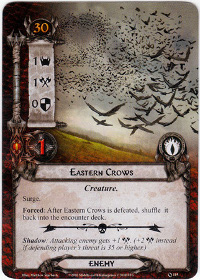
With our resources spent, we move on to the quest phase. With the backup that healing provides, we can safely commit all of our heroes to the quest, using Theodred’s ability to fuel Aragorn’s ability so that the Dunedain is ready for combat. For staging we reveal Eastern Crows. The crows are puny, but they do have surge, so for the extra encounter card we reveal Banks of the Anduin. With 4 willpower against 3 threat in the staging area we place 1 progress token on stage 1 of the quest. Not a bad start considering all we want to do at this point is tread water until we can deal with the Hill Troll.
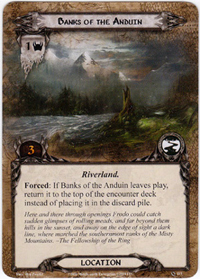 Next up, we will travel to Banks of the Anduin. Not all locations in the game have negative effects, and this card is a great example of an encounter card effect that can be used to your advantage. In a scenario like this, with cruel treacheries and big enemies running amok in the encounter deck, having an innocuous location that we can draw multiple times is a good thing. At first glance, it may seem counter productive to continually place 3 quest points worth of buffer between us and quest progress. However, when the alternative is cards like The Necromancer’s Reach, Evil Storm, or even a second Hill Troll, we will gladly slow our questing a bit to ensure a safer journey.
For the encounter phase, we will optionally engage the Eastern Crows, because we want to get them out of the staging area. In the ensuing combat, we will choose not to declare a defender, since we have Daughter of Nimrodel to heal whatever damage the crows deal. With much relief, we reveal the shadow card for the attack as the other Hill Troll! This is a great stroke of luck, with one Hill Troll in the staging area, and another just placed in the discard pile, we can now plan our strategy for the remainder of this scenario knowing that no more trolls will be accosting us. Aragorn takes 1 damage from the crows, then counter-attacks and kills them. When then exhaust Daughter of Nimrodel to heal the 1 damage on Aragorn. This is the advantage of having repeatable healing, it frees us to take undefended attacks from smaller, less powerful enemies, which then allows Aragorn to be ready for counter-attacking. After increasing our threat to 29 we are ready to move on to the next round.
Round 2: Stage 1B (1 of 8 progress) – Threat 29
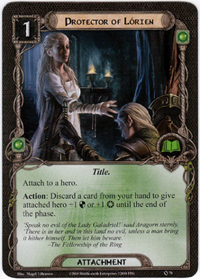
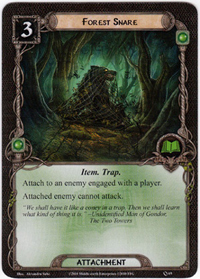 After adding resources, we draw a Forest Snare. Perfect! Our deck seems to be making up for all of the bad luck in the first game; this time everything is playing out exactly according to plan. It’s good not to get overconfident, and we still need to quest successfully to keep the troll from engaging until we can prepare our trap. Since we want to save for next turns expensive combo, our planning this round consists solely of attaching Protector of Lorien to Aragorn. Because Aragorn’s ability means we will always try to commit him to the quest, any kind of willpower increase, even a conditional one like this title, is a good call. As an added bonus, we can pitch cards to make Aragorn a more effective defender against a nasty shadow effect.
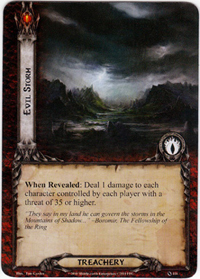 With that done, each hero now has 1 resource and we move on to the quest phase. We will again commit all of our heroes to the quest, doing the usual Theodred trick to ready Aragorn. For staging we reveal Evil Storm, no effect. This treachery provides a great example of just how important it is that our deck has a starting threat of 28. Sure, in designing our deck, we could have included bigger, more powerful heroes, but that would have pushed our starting threat well over 30. That kind of design would be particularly problematic against a scenario like Journey Along the Anduin. Not only would a starting threat that high ensure that the Hill Troll engages us immediately, but it also would put is in range of treacheries like this.
If our threat had been high enough to meet the threshold for this card, it would have set our strategy back quite a bit. Not only would it have put 1 damage on each of our heroes, even the ready Aragorn, but it would have killed our Daughter of Nimrodel – the one character capable of healing. In any deck-building game, design is a matter of trade-offs, and this card highlights the advantage of sacrificing high-powered heroes for a more low-profile approach. Every scenario is different, and if we did not have an answer like Forest Snare the increased threat of a bigger hero like Glorfindel would make a lot more sense. As it is, our deck is all about starting slowly and building up an army of allies, rather than a more brute-force approach.
With 1 threat in the staging area for the Hill Troll, we make 3 progress which is just enough to explore the Banks of the Anduin. The Banks goes back on top of the encounter deck, which is great because we can plan our next quest phase knowing that nothing bad is going to happen to any characters committed to the quest. With nothing else to do this round, we increase our threat to the all-important 30 and move on to round 3.
Round 3: Stage 1B (1 of 8 progress) – 30 Threat
With our threat at 30, we know that, one way or another, we will be engaging the Hill Troll this round. After collecting resources, we have 2 resources on each of Aragorn and Theodred, and, thanks to Steward of Gondor, 5 resources on Denethor. Next, we draw Gleowine. This is a welcome sight, given that card drawing is the one strategic element that we don’t yet have working in our favor. We will want to get the Minstrel in play and singing as quickly as possible in order to help establish board supremacy.
During the planning phase, we finally get to pull off our long-awaited combo. First we pay 2 resources from Theodred and 1 from Aragorn to play Son of Arnor. After he enters play we will trigger his response to force the Hill Troll to engage immediately. It is worth reiterating, the fact that this works during the planning phase is very important; by trapping the troll before the combat phase, we will not have to deal with his massive, and potentially threatening attack. As an added bonus, this also removes 1 threat that would have been in the staging area during the quest phase. Now that we have him engaged, we will pay the 3 resources from Denethor to attach Forest Snare to the Hill Troll. The troll is now rendered harmless. Lastly, we will pay the 2 remaining resources on Denethor to play Gleowine. At this point, the superior resource generation of Steward of Gondor is plain to see.
Entering the quest phase, we have solved the Hill Troll problem, and we now have healing and card draw working as intended. As long as we play carefully but aggressively, we should have this scenario in the bag. Since we know the Banks of the Anduin is on top of the encounter deck, we can safely quest with Theodred, Denethor and Daughter of Nimrodel. We will hold back Aragorn because, at this point, the resource is more valuable than the 2 willpower. Theodred gives himself a resource. With treacheries like The Necromancer’s Reach, we ordinarily wouldn’t risk our healers on the quest, but in this case we know that it is safe. After Banks of the Anduin is revealed, we make 2 progress on the quest.
Next we will travel to Banks of the Anduin, so that we can do this same trick again 2 rounds down the road. Knowledge is power, and knowing what is coming from the encounter deck allows us to optimize our questing and combat decisions. Even so, this quest is starting to feel more like a Journey In Circles Along the Anduin. With no enemies capable of attacking, a shadow card will be dealt to the troll, and ultimately discarded, without resolving its effect. [Beorn’s Note: In playtesting, I mistakenly did not deal this shadow card, which would have been The Brown Lands. This obviously effects the flow of the game as that copy of The Brown Lands would not have been revealed again during staging in the next round. My apologies, dear readers – even bears make mistakes from time to time.]
For the counter-attack, Aragorn and his Dunedain brethren, the Son of Arnor, attack the Hill Troll and deal 2 damage to it. The trolls inevitable death of a million cuts paints a vivid mental picture. One can almost hear the lumbering and thrashing of the gigantic monster, screaming with its leg caught in a trap, its tree-like limbs thrashing uselessly as it is slowly hacked to death by a darting slashes of our intrepid pair of rangers. Grisly as this may be, our approach is much preferable to taking on the troll in a fair fight. That 6 attack is simply too much for anything in our deck to effectively handle. Before the end of the round we will use Gleowine to draw a Snowbourn Scout. We increase our threat to 31 and move to the next round.
Round 4: Stage 1B (3 of 8 progress) – 31 Threat
After collecting resources and drawing another Daughter of Nimrodel, we are faced with a choice of how to handle the rest of this quest stage. We have most of the necessary pieces in place for our deck to be successful. The last piece of the puzzle, Faramir, is already in hand. At this point we want to do two things: quest aggressively, and kill the troll. The reason it is important to move on the the next stage of the quest quickly is because we have limited means for lowering our threat in this deck. Unless Gandalf makes an appearance, we are still at risk of reaching 50 threat before we complete the scenario. With the game well under control, this would be an ignominious way to lose. For our planning phase we will play Faramir, allowing us to fully realize the strategy for this deck.
For the quest phase we will commit all of our heroes, readying Aragorn with Theodred’s help. For staging we reveal a Brown Lands. It’s 5 threat is obnoxious, but on the plus side, it will be explored the instant we travel there. With staging done, we will go ahead an exhaust Faramir to trigger his ability. Since we want to explore the banks of the Anduin this round, we will go ahead and use Protector of Lorien to boost Aragorn’s willpower. By discarding Snowbourn Scout we give ourselves the necessary willpower to explore the Banks of the Anduin. We could have waited, and used the scout on the Brown Lands next round, but it gets explore when we travel there, so doing this way is effectively the same, with the advantage that we can use that 1 resource on other, more effective allies.
With the Banks of the Anduin again on the top of the encounter deck, we give ourselves that much needed foresight for planning next round. It’s nice in this scenario, being able to know what is coming, and still use Denethor to help with other things. We travel to Brown Lands and it is immediately explored. Aragorn and Son of Arnor again hew another 2 damage into the Hill Troll, leaving it with 5 hit points remaining. With the Gleowine, we draw a Sneak Attack, which could come in handy later. Now if only a certain Grey Wizard will show up. We increase our threat to 32 and go to the next round.
Round 5: Stage 1B (3 of 8 progress) – Threat 32
After collecting resources, our deck rewards us yet again when we draw Gandalf. At this point I just want to take back every bad thing I ever said about our deck. In this scenario, our deck has drawn about as perfectly as you could ever hope to draw. For planning, we will play our second copy of Daughter of Nimrodel. At this point, the healing is not really needed, but her 1 willpower is always nice for those rounds when we know that it is safe to commit weak characters to the quest.
Speaking of which, with Banks of the Anduin about to be be revealed, so we quest with Theodred, who gives a resource to himself, and both Daughters of Nimrodel. Faramir then triggers his ability right away, since there is no danger of a treachery. This gives us 6 willpower to the 1 threat of newly revealed Banks of the Anduin. With a net of 5 progress, we have the 8 progress that we need to move to stage 2. Unfortunately the Hill Troll is still in play, and we can’t move to the next stage of the quest until we defeat him. We travel to Banks of the Anduin yet again. At this point, if any eagles happen to be flying overhead, they must certainly wonder why this silly group of adventures is aimlessly wearing a path around the same loop on the banks of the Anduin.
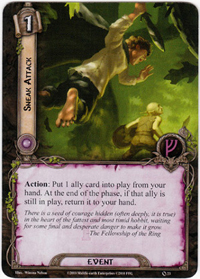
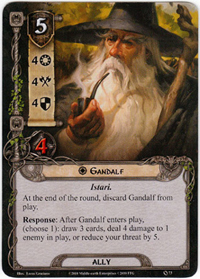
During the combat phase, we will sneak attack Gandalf into play, triggering his ability to lower our threat to 27. We don’t need his damage dealing ability at this point, and as nice as it would be to draw 3 cards, we have Gleowine to handle that. Since Gandalf is the only means in this deck for lowing our steadily increasing threat, we will use him for that. Gandalf, Aragorn and the Son of Arnor are then able to finally subdue the Hill Troll, which immediately moves us on the next stage of the quest. Gleowine then draws our second Steward of Gondor and we increase our threat to 28.
Round 6: Stage 2B – Threat 28
With resources gathered, we draw a second copy of Protector of Lorien. At this point, it makes sense to go all-in for the win. In retrospect, traveling to Banks of the Anduin might have been a mistake, since it buffers the quest stage by 3 progress. However, since the Grey Wizard was sneaky last turn, we have him back in our hand and ready to help with the quest. between Gandalf, Faramir’s ability, and Protector of Lorien, we should still be able to end the game this round.
For planning we will pay 5 resources for Gandalf and use his ability to 3 cards (Miner of the Iron Hills, Faramir, Erebor Hammersmith). We could have lowered our threat again, but the plan is to end the game this round, and I want to draw allies to help me do that, or at the very least fodder to be feed to Protector of Lorien. With that in mind we will also play Guard of the Citadel and Erebor Hammersmith. For giggles, we can trigger Erebor Hammersmith’s ability to return the Forest Snare to our hand. Though it isn’t really needed for enemies, it can at least be discarded to Protector of Lorien for an additional willpower.
For the quest phase, we will commit everyone except Faramir, Son of Arnor and a single Daughter of Nimrodel. With a little luck, this will be enough willpower to complete the quest, and the remaining allies along with Aragorn will be enough to kill any enemies that come at us. We will ready Aragorn and reveal 2 encounter cards for this stage. The two encounter cards revealed are another Banks of the Anduin and Dol Guldur Orcs. The Orcs require us to deal 2 damage to a questing character, which Gandalf takes with a laugh. After trigger Faramir’s ability we discard Steward of Gondor and Forest Snare to the Protector of Lorien attached to Aragorn. We now have a total of 19 progress, which is just enough to explore Banks of the Anduin and put the 16 progress that we need to complete stage 2 of the quest. This is where the ally army strategy can really shine, individually these allies seem frail and weak-willed, but with enough of them working in tandem with Faramir, you can very easily have game-winning turns like this.
 Once we progress to Stage 3B, we have to reveal 2 additional cards from the encounter deck, then we will not have to do the staging step in this quest ever again. Lady luck is smiling on us today, as we reveal Gladden Fields and an Enchanted Stream. The staging area is now filled with locations, but our only concern is the orcs. All that we have to do is defeat the Dol Guldur Orcs to remove the last enemy in play, and we win the game.
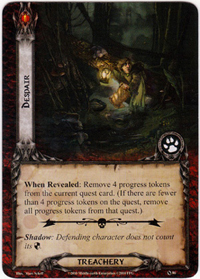
With a threshold of 10, the Dol Guldur Orcs engage us. We will defend with our ready Daughter of Nimrodel, to free up Aragorn to kill the Orcs. Revealing the shadow card for the attacking Dol Guldur Orcs, we have Despair, which nullifiers her defense. Against a hero, with a troll attacking, this card is a death sentence. In this case, the Daughter was not going to survive the attack anyway. So we sacrifice an ally to avoid risking an undefended attack against one of our heroes. Aragorn then kills the Dol Guldur Orcs with one easy swipe of his sword. With no enemies remaining in play, and we have won the game!
Score and Recap
Even facing the terrible Hill Troll, our Journey Along the Anduin was much less difficult than finding a Passage Through Mirkwood. We completed the quest with no dead heroes, and not even any damage on our heroes. With a threat of 28 after 5 full rounds (rounds tally during the refresh phase) and 4 victory points for the defeated Hill Troll, our final score is:
28 (threat) + 50 (rounds) – 4 (victory) = 74
There’s not much more to say about this playtest session. Our deck drew perfectly and some lucky timing on treacheries meant were able to quickly build momentum. With resource generation running from round 1, we were able to quickly field our army of allies. Once the Hill Troll was dispatched, Faramir combined with Protector of Lorien and the power of a sneaky Gandalf allowed us to power through the quest.
Not every scenario will go down this easily, but it is important to recognize how critical design and tuning where in this victory. Of the cards that were essential to this victory, every single one has at least 2 copies in our deck. Consistency is very important, particularly for cards like Forest Snare that are our only solution to certain, rather large and hairy problems. In cases where you can’t put multiple copies of a card in your deck, using Gleowine and Gandalf to draw more cards is quite often an acceptable substitute.
That’s all for today, the Beornings are restless and need to let off some steam. I think I smell a Warg pack not far off, and its a perfect night for a hunt. Check back soon as we continue on our path through the core set scenarios. Next up we will be building a Spirit/Tactics deck to help us try an Escape From Dol Guldur with two decks.



I’m really enjoying this series. It should be a very useful tool for new players.
That said, the resource tracking in this entry is a little hard to follow. Both Leadership resources are spent on turn one, but you mention 2 on each hero on turn two (should be 1). For turn three, you mention 3 total between Aragorn and Theodred (should be 4), spending them for the Son and then using Theodred on himself (leaving 1 on each). So when you play Faramir on turn 4, you have the correct number to spend, it just hasn’t been tracked accurately in the article.
I would have found it difficult to mulligan away the Sneak/Gandalf, which is a wonderful way to kill the Hill Troll on the second turn. That the deck has multiple ways to power through that tricky opening is a testament to its strength, especially coming from one core set.
Good catch, William! I transcribed the game report correctly, but the error crept in when it came time to write the article. I have fixed this so that it should be much more clear. For play-through’s like this, I almost need some kind of iconography to show how many resources are on each hero after the resource phase.
As for the mulligan, I can definitely see your point. There is a certain amount of risk in giving up a hand with Sneak Attack and Gandalf. One of the things that I’m really trying to focus on in this series is correct deck design that is based on synergies and consistency. Sneak Attack and Gandalf are great, but what I most wanted to illustrate with this deck was how powerful it can be when you get each of its three main strategic pillars established. This will more naturally lead into the later scenarios where a Hill Troll is not the biggest obstacle to victory. By taking the risk, we were able to setup card draw, healing, and quest boosting, all of which contributed to our eventual victory.
This is admittedly a bit artificial when I could have just kept the opening hand and gone with a hyper-agressive strategy. Still, I feel that the approach I took was better to illustrate the finer points of the deck’s design. More than anything, I do not want to encourage new players to rely on “one-trick ponies” for their decks to be successful.
Nice session/strategy report, and great blog in general! Between this and Tales from the Cards, we’re spoilt for the incredible amount of high-quality articles being produced.
I did notice a rules mistake in your playthrough though:
“With no enemies capable of attacking, we do not need to deal any shadow cards.”
Shadow cards still get dealt to enemies who are trapped by Forest Snare. This also means that at one point Banks of the Anduin should’ve been dealt as a shadow card after it was put back on the encounter deck. If I’m correct then it would’ve been discarded afterwards and not returned to the deck. (I don’t think shadow cards count as being in play, therefore its forced effect doesn’t apply in that case.)
Good eye, scwont! For some reason, I was thinking that the shadow card was dealt after the attacker was chosen in step 1. You are absolutely correct, one (or more, in some cases) shadow card is dealt to each engaged enemy at the very beginning of the combat phase. I must be groggy from hibernation or something, lots of mistakes in this one.
In any case, I’m glad that you are enjoying the blog. Thanks again for the sharp eyes on the rules mistake.
I do not assigns the shadow card an enemy who is trapped? location Banks of the Anduin would be removed in the 4th round as a shadow card.
oh I’m so sorry. I don’t read the post up here. In it he writes the same thing.
Dont you reveal 2 cards per player on stage 3b too? So potentially 2 more enemies to deal with & another turns play.
This series is really good though!
Good catch Jonathan. I actually did reveal two more cards in the play-through, they were both locations. For some reason, I omitted this detail from the article, which makes it look like I skipped it, instead of just being lucky. I have gone back and fixed this, thanks for pointing it out.
Pingback: Beorn’s Path: Part 5 – Building a Second Core Set Deck | Hall of Beorn
Another picky rule subject i noticed: i think you can not bring the Steward of Gondor from your hand, tap it and use the resources of that action to play another ally. The action window you used to trigger the steward is located at the end of the planning phase, isn’t it?
The player action window during planning for playing allies and attachments stays open until a player “passes” or decides not to play any more allies or attachments. Players can still take other player actions (play events, trigger effects such as the one on Steward of Gondor) during this window, the only limitation is that the active player is the only one who can play allies or attachments from their hand during this window. It is even allowed, in a multi-player game, for another player to play effects like the Campfire Tales event, or triggering his ability to send Bifur a resource, all while it is the active player’s turn to play allies and attachments. Once the active player has passed on playing allies and attachments the next player to their left becomes active player and it is now too late for the previous active player to play allies or attachments. Since, in the above game, I had not yet passed on playing allies or attachments, it was perfectly legal to immediately use the resource that I gained from triggering Steward of Gondor’s effect. The player action windows in Living Card Games can be kind of confusing, so hopefully this explanation helped explain it in more detail. You also may want to consult the chart at the end of the game rules, which you can find here:
Click to access LOTR%20Rules.pdf
Specifically, I am referring to this section on the Planning Phase:
2. Planning Phase
• Player actions.
• *First player plays ally and attachment cards.* <– This is where I triggered the Steward of Gondor, Because it is marked in green, it means that any player can take actions and trigger effects. Only the active player can play allies or attachments, but a non-ally/attachment effect does not automatically mean that you have left this step of the planning phase. Only the active player "passing" on playing more allies/attachments makes you leave this step of the planning phase.
• Player actions. <– I would not be able to play more allies during this step (if for example another player had played it on my hero during their, later, "play allies and attachments step".
• Next player plays ally
Thx Beorn for your detailed clarification! I used to play it this way until we adapted to the houserules of a coplayer in which (besides other changes) the action window was opened and closed right after playing cards from hand in the planning phase. Somehow i sticked to this routine and forgot to check it up again. As you stated above the green marking of that phase on the timetable is the relevant factor…
Beating the game is a little bit harder without this open planning phase 😉
I thought Sneak Attacking with Gandalf didn’t trigger the part on Gandalf’s card which says : ‘After Gandalf enters play, choose…’ , because actually Gandalf doesn’t enter play, it’s a card effect of Sneak Attack. (I thought I read this somewhere in the rules section on BoardGameGeek) So you can’t use both his stats and his special ability with a card like Sneak Attack. Cheers.
If Gandalf read “After you play Gandalf from your hand…” then you would be correct, it would not be possible to trigger his ability after using a card like Sneak Attack. However, because his response says “After Gandalf *enters play*” it IS possible to trigger it after playing Sneak Attack. Gandalf is entering play, he is just not being “played from hand”. This is why most decks that include Leadership use Sneak Attack with Gandalf, it is a very powerful combo.
I’ve playtested this deck against Journey Along the Anduin, and I gotta say it just doesn’t work like you presented it. I’ve run this deck against the scenario about 20-25 times, and I’ve beaten it exactly once. 19 progress? Seriously? Your article makes it sound like this is an easy-peasy win against the scenario, and nothing could be further from the truth. If you’re playing beat-it-once-and-move-on, then fine, but a consistent performer this deck is not.
I play each of the scenarios three times. It’s been a while, but I believe that I won twice and lost once. I don’t honestly have time to play each of the scenarios dozens and dozens of times. To be frank, I barely have time to make regular updates to the blog as it is – this is a labor of love. I created Beorn’s Path to try and help new players, I am sorry if it is not proving helpful to you.
I wish that I had easy answers for how to have better success with this deck on Journey Along the Anduin. Using only core set cards against the second two core set scenarios is not easy. Many of the early scenarios are notoriously inconsistent, so it is entirely possible that my two victories were just lucky draws of the encounter deck. Journey Along the Anduin in particular is very challenging as you basically need to draw Gandalf to stand a chance. Sneak Attack and Gandalf are the only consistent solution that this deck has for dealing with the very difficult situations presented in Journey Along the Anduin and Escape from Dol Guldur. Forest Snare is another good way to handle the Hill Troll in particular, so you want to look for either of those cards in any opening hand. Many other cards were printed later that are a great help in these scenarios, but the core set has limited options.
I will not claim that this deck (or the Tactics/Spirit deck that I paired it with) are the best decks ever built, but any core set deck that you build will have to get a bit of luck in order to survive a solo game against this scenario. That said, I have used this deck (with minor tweaks and additions) to beat every scenario in the Core Set and Shadows of Mirkwood Cycle, more than once. The deck might not be the best core set deck, but it certainly is not a bad deck, by any means.
This scenario in particular is very challenging in solo play; I suspect that much of the playtesting for it was performed with 2 players. Because only 1 Hill Troll is added to the staging area in stage 1B, regardless of the number of players, you may want to consider playing this two-handed, or with a friend, using both the Leadership/Lore and Tactics/Spirit decks. Or, if you don’t like the core set decks I’ve built, I encourage you to try your hand at building your own decks for this scenario. Most of all, don’t get discouraged. It is truly unfortunate that you have had such a bad experience with these decks, hopefully you can tune them or build different decks which allow you to be successful. Good luck!
Well I have to say I really have egg on my face now, because I just realized I was making a MAJOR playing error that skewed everything. Suffice to say that if there was a way to delete my post I would. I’m off to play the right way now…
I didn’t mean to imply that the blog hasn’t been helpful – it is actually a godsend for those of us who are starting out late but want to have the experience of playing the game in the order of release rather than just building a power deck out of what is currently available. Honestly I tried to learn the game as recommended in the rulebook, using the decks presented in the core. Three out of the four “starter” decks fail miserably against the first scenario, which does not make for a positive intro to the game. Although they say to play with each sphere to get an idea of the strengths and weaknesses, what is revealed is mostly weakness. The Leadership/Lore deck your original articles built is really brilliant against Passage Through Mirkwood – I used it to get consistent wins as low as 91 points. Against Anduin it’s a different story – and I suspect Escape will be even more brutal when I get to it. Honestly I am only venting a little because the tweaks seemed logical but the reality was that I was still getting crushed all the time, either early on by not getting the Arnor/Snare combo, or later by having the threat build up in staging so I couldn’t quest. The game I won took 13 turns and I barely pulled it off after losing Denethor in turn 12 – my score was a whopping 169! Reading about you doing it in 6 rounds seemed like science fiction.
I hope you will continue the series as able. I am lucky that I have the opportunity to play a scenario multiple times – I know it is not something that everyone can do. I’m going to try two-handed next – we’ll see where that goes!
Again, thanks for all of this and I didn’t mean to come off too critically. I’m looking forward to future installments!
Hi,
I just wanted to say how useful (and fun) I’m finding your Beorn’s Path series. I bought LotRLCG a few months ago and played a few games with the 4 starter decks, and even managed to beat the first scenario a couple of times with them. The second scenario proved impossible (at my hands) to the starter decks though. Thus I didn’t play again for ages – until tonight, after I found your page (and TalesfromtheCards) and became reinvigorated into having another go. I used the Core set (it’s all I have atm) to build the exact retuned Leadership/Lore deck you used above, and tackled Journey Along The Anduin, hoping to beat it this time. I played twice (solo) and lost both times, but had a lot of fun regardless. I’m glad I found your guide and used it to play my first multisphere game, since it’s a different beast to monosphere play – many more tough decisions, and losing a hero feels even more painful once you realise your source of resources for one sphere is totally gone!
In the first game, I had treacheries pile on some threats on me from the start, so the Hill Troll engaged with me from turn 2! Bad times. I eventually managed to kill him by putting out lots of allies and throwing them at him when he attacked, but, as you warned, this ended up with me being horrifically Threatened, Theodred bought the farm, and eventually I was just unable to get the progress tokens out quick enough in the second stage before my Threat hit 50.
The second game was worse, and although I drew Gandalf and Sneak Attack early, thus bringing my Threat down to the low 20s at some point, I just couldn’t draw Forest Snare or any of the other decent card drawing sources, so I had to sit there watching the staging area fill up with horrors. After many turns of drawing exactly the wrong cards (at one point I even used my third Gandalf to draw 3 cards, and still got nothing useful), both Hill Trolls found themselves in the staging area, and once my Threat hit 30 they jumped me and I managed to last only a couple more turns. In both games I got some key attachments out, including Steward on Denethor (both games) and the Stone on Aragorn, and I used the Aragorn/Theodred combo a lot (even though it does feel like it takes Theodred out of the game a bit – if only he had 2 willpower not 2 strength!). I know my problem was not drawing the right cards at the right time – if only I’d drawn Faramir in the first game at a late stage, then I could have maybe surged for the win like you did.
I have been finding that I’m (possibly) not using many of the allies in the most efficient way, however. The Miner of the Iron Hills I just ended up using as chumps; ditto the Hammersmith. Is that how I should be playing them, or should I hold back on playing them until they can have a better use? The peeking abilities of Denethor and Henemarth Riversong I also almost never used – is it best to use Denethor for his palantir ability in this deck/scenario, or is he better as a defender (I’ve realised 3 is a pretty amazing defence in this game) or as a quester? Generally, I felt that I would have liked more drawing powers (I frequently found myself with no cards in hand, which also renders Protector of Lorien useless), and I might try to tune this deck by dropping some allies and putting in some more card-drawing sources (if they exist in my collection!) to see if I can get to that Forest Snare early enough! (I’m also considering replaying the scenario using FF’s new Easy Mode rules, which will get rid of some of the most crippling hazards, and may give me a chance at beating this thing…). Advice?
Anyway, I just wanted to share my adventures and thank you again for writing such a great and helpful blog. I’ve now ordered the Khazad Dum pack and the Watcher in the Water/Shadow and Flame packs, so that I can try some Moria-based scenarios, and also I hope to use some of the player cards therein to start building some decks of my own.
Yes, card drawing effects are very important, Unfortunately, the core set does not give you many sources of card draw. Aside from swapping out Denethor for Beravor, which is certainly an option, every other Lore and Leadership option for drawing cards is already included in this deck.
Journey Along the Anduin is a very difficult scenario to beat solo, especially when you are limited to the core set player cards. I really feel that this quest was designed to be played with two players/two decks. You may want to try it two-handed (one player playing two decks) using the Spirit Tactics deck that I built for Escape From Dol Guldur. You will find that it is much easier for two decks to defeat the Hill Troll without taking on so much threat. Ian over at Tales From the Cards has a great article about playing two-handed: http://talesfromthecards.wordpress.com/2013/02/06/a-guide-to-playing-two-handed/
Aside from that, I would encourage you to make tweaks to the deck to fit your play style. If you find that you keep drawing allies when you want events or attachments, feel free to take out some of the allies for cards that you think are a better fit. Deck building is an art, one that is as much about matching the style and expectations of the player than it is about any all-encompassing strategy. When you get the new player cards from Khazad-dum, Watcher in the Water and Shadow and Flame, feel free to use those to bolster your deck as well. Good luck, and have fun!
I’ve played this quest with this deck twice and been soundly thrashed both times. Poor draws and some brutal treacheries destroyed me.
Questions:
1. With Snowbourn Scout’s response to add 1 progress token to any location, does that apply to quest cards too? For example, I had no active locations and none in my staging area – does this mean I can apply the progress token to the quest card, or does nothing happen?
2. During the setup of the game, it says to draw a card from the encounter deck and add it to the staging area. I pulled a treachery (that I can’t remember the name of offhand) which basically says to add 1 to your threat level for each character not committed to a quest. Does this mean that I add 3 (which means the Hill Troll is engaged from round 1 (this is what I did)), or does nothing happen because we’re not in the questing phase?
Cheers
Here are your answers, Scott:
1. Snowbourn Scout can only place a progress token on a location in play. If there are no locations in play you probably want to wait on playing him, unless you really need him as a chump blocker.
2. Pursued By Shadow is the card that you revealed. The text says “When Revealed: Each player raises his threat by 1 for each character he controls that is not currently committed to a quest.”. Because none of your characters is committed to the quest during setup, this card will raise your threat by 3. This is just bad luck on the timing.
Journey Along the Anduin is a challenging scenario, particularly in the early rounds when you have to deal with the Hill Troll. Either Gandalf or the Forest Snare are your best options for dealing with the troll, but you will need a few rounds (without unlucky treacheries) to get setup. Good luck!
I traveled to the The Brown Lands. I explore it. I can travel again in the same turn?
No, you cannot travel again. You have the option to travel once during the travel phase. Even if the location that you travel to is explored immediately (as is the case with Brown Lands) you have to wait until the next round’s travel phase before you can travel again.
Thank you Beorn! I just bear-ly (sorry, had to!) successfully made it down the Anduin River using your guide. I must say, that Hill Troll had me shaking for a bit, and I was so close to giving up at a couple points. But, thankfully Gandalf showed up at the right moments, as he tends to do, and our heroes made it safely.
Cheers!
Pingback: Deck: Aggro Boromir | Hall of Beorn
Great article, Beorn. I referenced these many times when I first began the game, and I still read them from time to time.
“Knowledge is power”… quite true. But forget not what the Lady Galadriel said to Frodo and Sam: “Seeing is both good and perilous.” 😉 Keep up the good work, Beorn!
Thank you Beorn. You’re advice has been very useful in my deck building adventures.
I do have a question. I’ve mostly been playing solo, but I just started playing with a friend, and we were wondering if we can play cards on each others playing areas. For example, can he purchase Steward of Gondor and play it on one of my heroes and vice versa? Thanks.
Thanks, Kooltone! Yes, you can absolutely play attachments on characters controlled by other players. Allies always come into play under your control, however. Good luck!
Hey, just want to thank you for the guides and path information.
I just started playing with the core set — I ran each of the base player decks against Passage to Mirkwood until I could get a win (first time for Leadership and Tactics, two tries for Spirit, three tries for Lore). Then using the deck building hints from here and Tales from the Cards I tried a Leadership/Tactics deck (Aragorn, Theodred, Legolas) against Journey Down the Anduin.
Boy, was that a disaster. I beat it, finally, after about 10 tries. Got close a few times, but invariably I’d built up too much threat while fighting the troll and I’d threat out in stage 2B, or a couple of times when it seemed like I was making great progress I’d draw the second Hill Troll and get flattened.
When I finally beat it, I had a great initial draw (including Gandalf, Faramir, Steward of Gondor, Celebrian’s Stone) that allowed me to bulk up on resources, hold the troll in the staging area, then bring in Gandalf on round 2 and knock out the troll in one round. Then build up allies, bring in Faramir to boost willpower, and cruise through stage 2B to the finish without too many challenges (partly with the help of Galadrim’s Blessing as I’d put a couple of Spirit cards in the deck for threat control just in case I drew Celebrian’s Stone for Aragorn).
After all the struggle, it feels like a great accomplishment to finally beat the quest; I learned a few key things (value of Faramir among them). Is the game always so dependent on random draw, or is that just a function of going solo with a core-only deck? I could only have improved my initial draw by say pulling a Sneak Attack and another Gandalf.
Off to try your Leadership/Lore deck, or maybe a Spirit/Lore …
Thanks!
Great job! Faramir and Gandalf are two of the best allies in the Core Set, and the game as a whole. You are correct that outside of Sneak Attack and Gandalf, Leadership has limited card draw in the Core Set. Valiant Sacrifice can work, but you don’t always have an ally that you can afford to lose. Ultimately, the need for card draw effects are why I paired Leadership with Lore in my first Beorn’s Path deck. As you add expansions each sphere gains its own variety of card draw effect, but the two best ways to improve the consistency of your Core Set decks are to include Lore or to play smaller decks. This is why my decks for Beorn’s Path are only 40 cards. Until you build your card pool you can even build a 30 card deck with two spheres.
So I tried your Leadership/Lore deck (Aragorn/Theodred/Denethor) and after a middling failure against Anduin the first try, absolutely crushed the quest the second time. I had a phenomenal initial draw with 2x Sneak Attacks, 2x Gandalfs, Celebrian’s Stone and Forest Snare … cruised to victory and due to clever use of Gandalf actually finished with lower threat than I started. Such things I suspect are not the norm.
One question: when Sneak Attack Gandalf is wounded in play (I used him to defend against the troll in the Combat phase), does he keep the damage when returned to the hand? It would not have made a difference in my play-through as I had two Gandalf cards in hand, but it did cause me to wonder.
Damage only exists on characters (and enemies) in play. When a card leaves play, it loses all of its state (tokens, attachments, etc.)
Just got crushed on 2b. The Troll was already taken care of in 1b, but the staging area just kept filling up with high threat enemy’s and locations. Couldn’t get high enough quest points to get some progress on the quest. Was playing solo. The effect stated that every quest phase 1 additional encounter card was drawn…..but they don’t encounter?? After 11 rounds the threat went over 50. What did I do wrong? Or just unlucky with the cards? Got the feeling I never could get enough willpower points into the game.
Love you blog and the great info about the game and deck building!
Did you still optionally engage enemies on stage 2? The card specifically mentions that you can still optionally engage enemies during this stage. If you can consistently engage and kill (most) enemies, you can hopefully keep the staging area from filling up. Another very important card for this stage is ally Faramir. His willpower-boosting ability really helps if you keep drawing locations (or high-threat enemies) on stage 2. Good luck!
Well that optional rule set me off a bit, how do you do that exactly? Only with range or for example pull them with Son of Andor? Or is it ment as they don’t attack you, but you may decide you do attack from your raft ;-)? Sadly Faramir just didn’t pop up from my deck….. 😦
Optional engagement happens before you make engagement checks. You choose one enemy in the staging area, and you engage it – ignoring it’s engagement cost. Think of it almost as choosing to go to the enemy instead of waiting for them to come to you. You do not need a card effect to do this, optional engagement is a rule built into the game. It will help you to keep the staging area a bit less cluttered in stage 2. Since you are choosing which enemy to optionally engage, you can leave a larger enemy (like a Troll or Beast master) where it is, until you are ready to kill it. Just be prepared for stage 3, where engagement checks are once again made during the encounter phase.
Ok great! I played it like that today 🙂 Much thanks for all your help!
Replayed it two times today. First time just got crushed on 1b. Didn’t get the cards I needed. (should have mulligan) Second time I did much better and the cards where for once in my favour! 100 point in standard solo, so i think not bad.
Tons of great info on this blog! Thank you so much!
I will say that I’ve tried this deck at least a dozen times against this quest, and I’ve had three types of results:
1. Didn’t get a good starting hand, mulliganed, didn’t get a good starting hand, forfeit before first phase (approx 6-7 times)
2. Managed a workable starting hand, drew Hill Troll #2 on turn 3 staging, quit with 2 Hill Troll’s in staging, threat 30 and only one ally in play. (once)
3. Managed a workable starting hand, handled the Hill Troll, (once even handled his brother still on stage 1a), got no further than 2 progress on stage 2a before getting 6+ enemies in the staging area while also having hit at least one Necromancer’s reach and constantly pulling the 5 threat location (name escapes me). This has happened twice at least.
I also had a situation where I had to forfeit in stage 1a for some reason which is escaping me. So I guess 4 types of results, but in general, all abject failure.
I’ve lost, definitively, at least 6 times in the past couple nights. I’ve been stuck with no cards in hand (discarding to attempt to further the quest or just match the threat in staging), all Lore cards but no Steward of Gondor ever drawn so no resources, having 4 allies wiped out with a shadow Necromancer’s Reach…twice, and so on and so forth.
Is this quest really this hard? Am I playing wrong? I’ve used Gandalf for damage, card draw and threat reduction in situations I felt it was most useful. Is there anything I can try besides just keep playing and hoping for better luck?
Gandalf can be used to lower your threat and buy you more time to get setup. The key to this quest is being prepared for the Hill Troll, which is why keeping your threat low is so helpful. After that you want to drop as many allies as possible to help quest through stage 2 and be prepared for combat in stage 3. It also punishes you for having a threat at 35 or more, so you want to get through the second stage as quickly as possible. There are other Core Set decks that might fair better against this quest, but it is by no means easy with any Core Set only deck.
Here is an example of a different approach:
https://boardgamegeek.com/thread/1108855/back-basics-killer-deck-using-only-cards-single-co
And even this deck only wins about half the time, so don’t get discouraged by losses. Good luck!
Thanks again for your help! I tried your deck 4 more times last night, all with horrifyingly poor results. I finally changed over to the deck linked in your reply, and on the third try got the cards I needed early enough to win. I even killed off two Hill Trolls in stage 1B to get it done!
My score was 130-something at the end. Certainly not an incredible score, I’m sure. But man did it feel good to finally get through that quest!
I’m certain a significant portion of my failure can be attributed to my inexperience and that I’ll get better over time. I was hoping my past experience with card games (I’ve played quite a few) would give me a leg up, but I feel like I’m starting from scratch with this game, and I’m kind of OK with that!
Thanks again!
I just about managed this scenario with the deck, but I m a bit lost as to why you need to snare the hill troll before combat. Say I optionally engage the troll after questing, would I then not have the opportunity to snare him during the action phase of the encounter stage, before we start with combat?
No, that strategy would not work. Attachments and allies can only be played from your hand during the planning phase. By the combat phase, it would be too late. After defending against the attack, you could trap the troll on the following round, but the strategy I outline allows you to avoid the troll’s attack entirely. I hope that this helps to clarify everything. Good luck!
Why can you only use forest snare at the planning phase? I thought you can use player actions after encounter phase before combat?
Sorry I only have 1 play session for this game, quite confused. I can only reference the quick reference sheets from bgg.
Thank you
Woops… Just realized it’s not an event card but an attachment.. Couldn’t delete the post
Please disregard
Thanks, it looks like I was playing it wrong then. I’ll try again with the correct rules. Thanks for the quick answer and for this outstanding resource for LotR players!
You list a Radagast’s Cunning in your opening hand, but I thought we had removed them all while deck tuning in part 3?
You are correct, this was an error in my play notes. I had a copy of Secret Paths in my opening hand – not Radagast’s Cunning. I have updated the text.
So like others I really struggled wit success with this deck. Having just the Dwarrowdelf block besides the core. I was able to get better runs by switching Bilfur for Denethor. And adding 2 x estor 2x sword that was broken 3x daeron’s ruins and 3 x warden of healing. Help cycle faster and extra healing always a plus.
Those changes all make good sense. One of the challenges of Beorn’s path was that I limited myself to only the cards available when a given quest was released. This means that I only used Core Set player cards against the three Core Set scenarios. By adding cards from the Shadows of Mirkwood and Dwarrowdelf cycles, along with the Khazad-dum deluxe expansion, you can make this deck much more effective. The intent of this series was to provide an introduction to deck-building and strategic playing, so I’m glad that it inspired you to make your own changes. Thanks for your feedback and best of luck on your journeys through Middle-earth!
I knew that this was with a core set only. Just figured I share my additions to help those who may struggle on this quest. That if they have the dwarrowdelf set how they could add to the deck.
I now have added Return to Mirkwood, The Hills of Eymn Muil, Journey to Rhosgobel and On the doorstep. Plan to attempt 2 starter Dwarf decks til I can get the last 3 Shadow of Mirkwood APs and OHaUH
I have a quick question. With regard to Forest Snare can it not be used on the Hill Troll without using Son of Andor. I thought you could play the snare card at any point where a player action is allowed. Surely, this is possible in the encounter stage after we have engaged the troll but before combat. Is it necessary to snare him in the planning stage??
Never mind. Just read the answer to this above. You can delete my identical question.
Just finished this with a final score of 106. I lost Denethor on the last round.
Breakdown:
Final Threat Level: 34 (-5 from on round with Gandalf; would have been 39)
+Threat Cost of Each Dead Hero: 8 (Denethor)
+Damage Tokens on Each Hero: 6 (3 Denethor, 1 Theofred, 2 Aragorn)
+Rounds to Defeat Scenario: x 10: 70 (Starting threat of 28 – Final Threat 34 = 6 turns + [- 5 threat from Gandalf] 1 turn = 7×10 = 70)
– Number of Victory Points Earned: 11 (Marshland 3, Hill Troll 4, Chieftain Ufthak 4)
FINAL: 107
I have really been enjoying going through this. Thank you very much for putting this up. I am excited to start the next phase.
Hi. New player here. Very nice work with the blog.
This specific quest got me stomped for quite a while. I just couldn’t get enough questing momentum going in the 2nd stage so the locations piled up. After reviewing all the core cards again I included 2 copies of Ever Vigilant (action, choose and ready 1 ally card). It was a great help because I could use Faramir’s ability on my army of allies twice in the same turn. That meant a lot more quest-points. Result: the location’s didn’t pile up as fast and I had only to deal with 1 enemy in the 3rd and final stage of the quest. Win!
Well done! Yes, Ever Vigilant is a great card to use with Faramir.
Thank you so much for this! Just got into LotR LCG at the end of the summer (looking for a non-virtual hobby) and kept getting destroyed with the core decks trying to take on the 2nd scenario. This made it super manageable and a lot of fun, so much that I ended up investing in the next 6 APs to try and work through over winter. Thanks again!
I’m glad to hear that Beorn’s Path has been helpful to you. Happy adventures in Middle-earth!
I just lost this scenario 5 times in a row with this deck before successfully navigating it. I think the draws in your session are very close to optimal. If you draw a bigger threat as the setup encounter or first staging your tactic could quickly crash due to the Hill Troll engaging.
Still, it’s interesting to play through these scenarios with only the core cards.
Yes, and there are other Core Set decks with lower threat which give you more time to “turtle” and setup a powerful board state. I intentionally took the strategy I did because I wanted to teach the different strategies the game allows. This deck is a teaching tool with a variety of strategic options, it is not the most powerful Core Set-only deck.
BGG sent me here. I’ve been using your decks to learn, and I’ve found them pretty effective so far, even though I haven’t had your luck. Today, I beat Journey Along the Anduin with your Leadership/Lore deck, but it was an endurance match after a chain of Crows came up during the initial setup, and I wound up having to discard the whole hand to deal with a Necromancer’s Pass, among other things. I thought the Ambush (Dol Guldur BM, Chieftain Ufthak, DG Orcs, Crows and a flippin’ Marsh Adder to boot) was going to TPK the lot, but all the heroes managed to pull it out after some strategic chump blocking and a well-timed Forest Snare took the Chieftain out of the fight. The damage: 20(!) rounds, 1 DMG on Aragorn and Theoden, 45 threat, and 7 VP from a Hill Troll and Gladden Fields = 240 points. Whoof. Tomorrow’s project: a run at the Escape scenario with both Core decks. Keep up the good fight!
Well fought! I’m glad to hear that you were victorious. Journey Along the Anduin can be difficult with this deck, especially with the relatively high starting threat, but there heroes are powerful once they have some support.